Sorry, this is just a placeholder post – we need someone to build this guide! Click the button above if you’d like to contact us about building & submitting this guide.
Sorry, this is just a placeholder post – we need someone to build this guide! Click the button above if you’d like to contact us about building & submitting this guide.
Unfortunately the images for this guide corrupted. Hopefully we get a chance to replace them someday.
Relevant Models
All S-Series
Tools
13mm wrench or socket & ratchet
Removal
Note
Note: I recommend leaving the wiper blade installed during the removal and installation of the wiper arm. It will help protect your glass from scratches.
Step 1
Remove cap over the nut. If it hasn’t been lost, there is a plastic cap over the nut at the swivel point of the arm. Swing this cap up as far as it will go (no need to force it), then pull straight out. Should pop off easily.
Step 2
Remove the nut. The nut shouldn’t be too hard to get loose. It requires a 13mm socket or wrench, and is normally threaded (counter-clockwise to loosen).
Step 3
Remove the wiper arm. The arm should still feel like it is on there fairly solid – it and the post are both splined (have little ridges that prevent slipping). You can probably get the wiper arm loose by folding the arm completely upward away from the glass and wiggling it a bit. If this doesn’t work, you can also put some locking pliers on the arm near the swivel point and pull straight outward. (I did the pliers thing before a friend showed me how easy it was to wiggle it off…)
Installation
Installation is essentially the reverse of removal. The shorter of the two wiper arms goes on the passenger side. The only thing to really watch is the alignment of the wiper arm. Make sure the wiper posts are in the fully down position – hopefully this is how they were when you removed them. If they’re not, turning on the car with the wiper switch off for a few moments should complete any wiper cycle it might be in the middle of, and return the post rotation to the full-down position. DO NOT DO THIS WITH THE ARM RESTING ON THE POST. That would be a great way to have something go wrong, and scratch the glass.
With the posts in the full-down position, the wiper arm should rest just above the dotted area around the edge of the windshield glass – this is the normal resting position of the wiper blade. Put the arm on about where it looks right, carefully fold it down (without hitting the glass if the wiper blade isn’t on), and see where it is, then adjust accordingly.
Once the wiper is in the right spot, just tighten the nut pretty well, then snap the plastic cap back on.
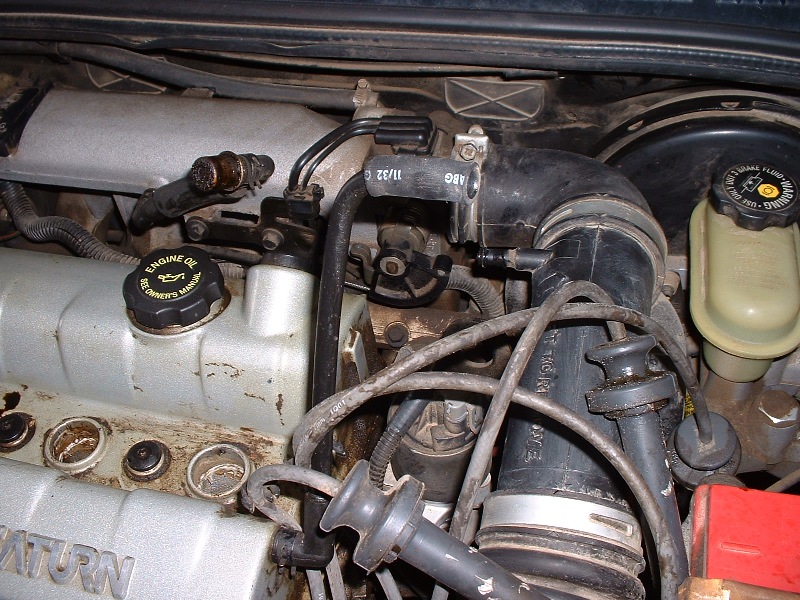
Remove spark plug wires. These just pull out. Pay attention for oil on the ends of the wires, as this is a sign of a leaking valve cover gasket that needs to be replaced.
Disconnect valve cover breather hose. I found it easiest to remove from the intake end of the hose, rather than the valve cover end. Just pulls off with your hand.
Step 4
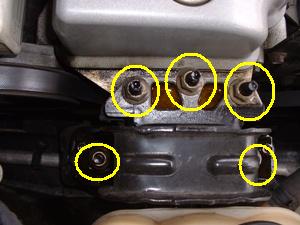
Remove valve cover bolts. Torx T40 bit, normal thread, 10 bolts total. As you stand in front of the car, there are 3 bolts on the side closer to you, 2 on the side away from you, 2 on the left side, none on the right, and 3 down the middle between the spark plug wells.
Step 5
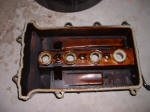
Remove the valve cover. At this point the only thing holding the valve cover down is the gasket, though it may surprise you how well it holds the cover on. If you cannot remove it, some careful but solid whacks in various places around the cover with a rubber mallet helps free it from the gasket.
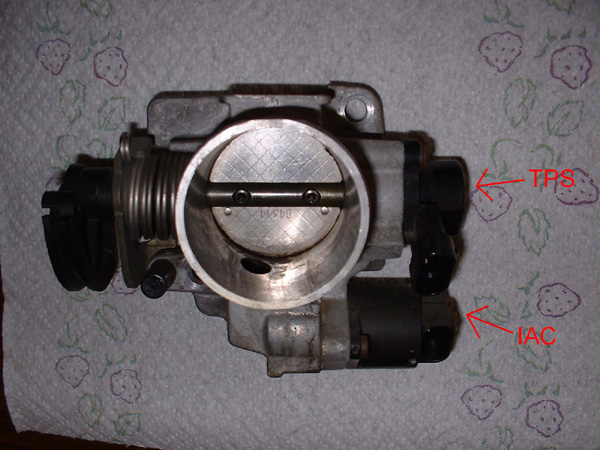
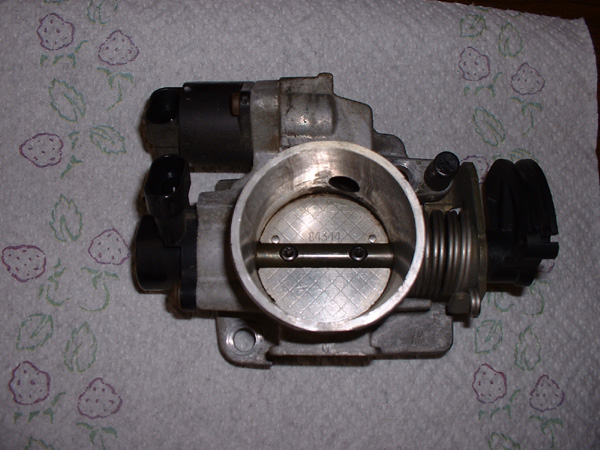
*These steps could be done with the throttlebody attached or removed.*
TPS = Throttle Position Sensor
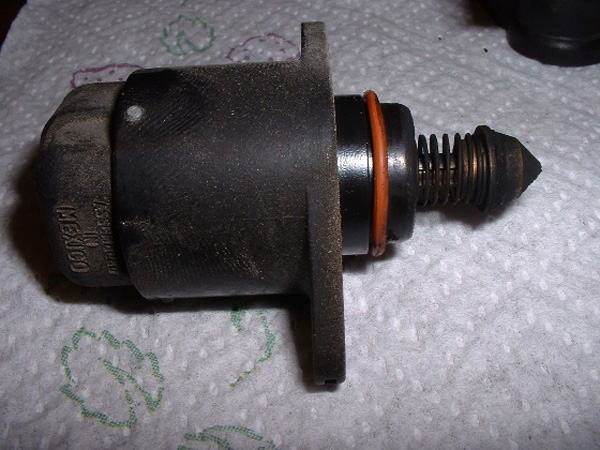
IAC = Idle Air Control valve
Tools
Torx bit (size?)
Removal
Step 1
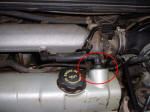
Before removing the TPS and IAC, unplug them from the wiring harnesses attached to them. Simply pull outward on the tab that clicks each into place, and pull the plug out of the harness.
See the photo below to identify which part is which.
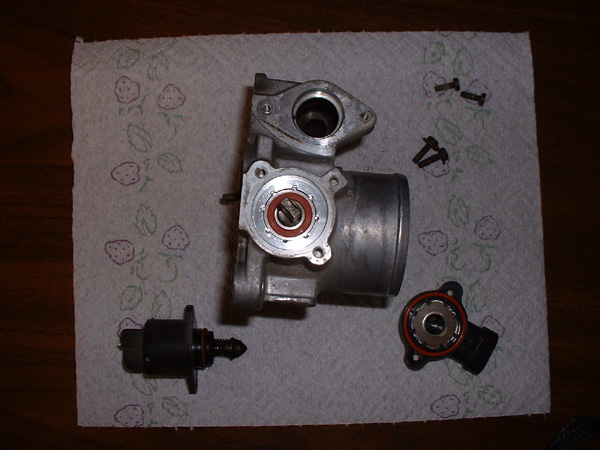
Step 2
To remove both parts, simply use a torx tool and loosen 2 screws on each.
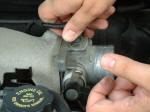
Remove Throttle Cable – While holding the cable, push & turn the quarter circle piece on the throttlebody so you can get some slack in the cable. The end of the cable has a round knobby thing on it holding it into the quarter circle bracket. Use the slack in the cable to turn the knobby piece so that it & the cable slide out of the quarter circle bracket.
Step 3
Remove Vacuum Block – This piece just unsnaps – be gentle.
Step 4
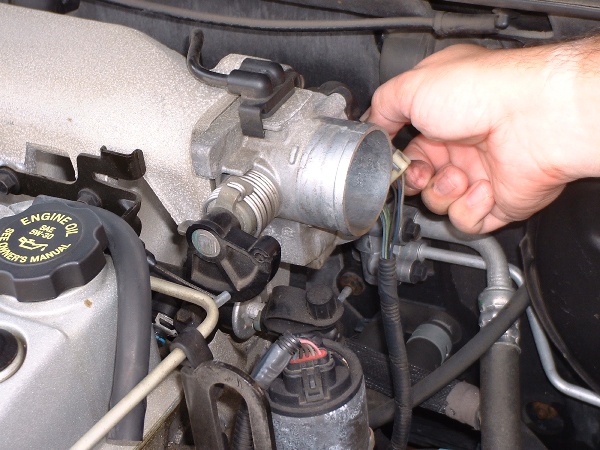
Remove Wiring Plug from Throttle Position Sensor (TPS) and Idle Air Control (IAC) Valve – Pretty straightforward unplug job – little clip on the side.
Step 5
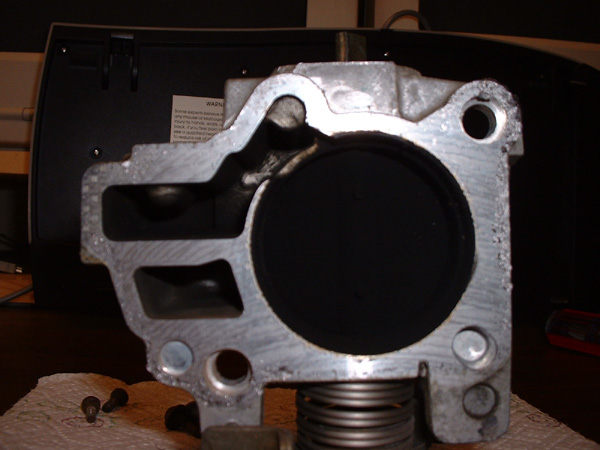
Remove 2 Bolts – Use a ratchet & socket (metric – forget size) to remove these 2 bolts. Once they’re out, just carefully take the throttlebody off the car – it should be somewhat loose, but may stick to the gasket a bit.
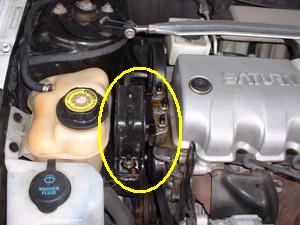
This is also commonly known as the upper engine mount, or is often listed in parts catalogs as just “engine mount”. It is good to know that there are 2 types of engine mounts. This one, and a “dogbone” style. The car (whether SOHC or DOHC) uses 1 TAM and 2 dogbones.
*NOTE* It is my understanding that the ’91 SOHC engines do not have this mount.
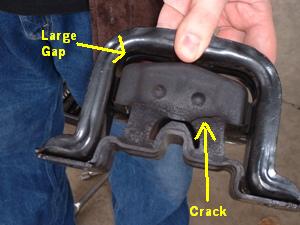
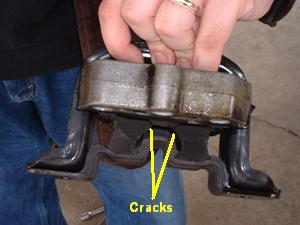
How to tell if you need a new TAM:
You need a new TAM if:
You see any cracks in the rubber of the TAM, or have rubber separating from the rest of the assembly
You can fit your finger between the rubber and the top metal of the TAM
Relevant Models
All 1992-2002 S-Series
Tools
PB Blaster or other lubricant (how badly, and even if you’ll need this may vary)
15mm deep socket
Breaker bar (or ratchet & cheater pipe)
Socket extension (6″ probably best)
Torque wrench (not 100% necessary, but recommended)
Jack
Piece of wood or substitute (cushion between jack & oil pan)
Parts
New TAM (about $40 from local parts store, or about $70 from the dealer)
New TAM bolts & nuts (may not be needed, should be returnable – check first)
Removal
Step 1
Spray the nuts/bolts with the PB Blaster or other lubricant and let sit. You could do this the night before, or a few hours before you work. It will make your life easier to prep the bolts this way.
Step 2
Park the car & make sure it’s secure. You won’t be lifting the car off the ground, so if you’re on level ground, setting the emergency brake should be sufficient.
Step 3
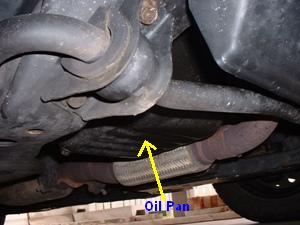
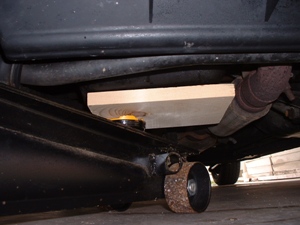
Lift the engine slightly with the jack. Put a piece of wood or something else between the jack and the oil pan. It’s best to put the lifting face of the jack close to one side of the oil pan so the vertical side of the oil pan can hold things and help prevent any denting of the pan. For now, you just need the jack to hold the engine and take pressure off the mount, so jack up just a bit after you start to see the engine or car rise with the jack.
*NOTE* I have a fairly long SUV jack, and was able to get it under the oil pan while still being able to operate the jack. Smaller jacks may not be able to do this, so you may have to lift the vehicle some to get under the engine far enough.
Step 4
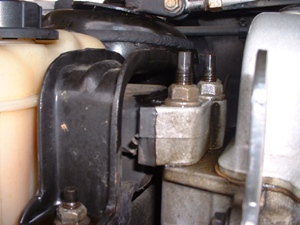
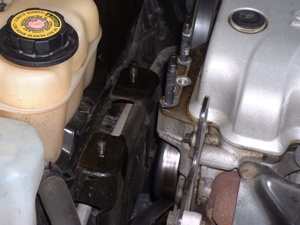
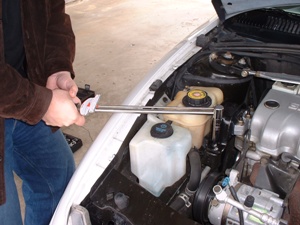
Remove the nuts. There are 5 nuts to remove. If things go nicely, you just remove them. There is a chance, though, that the nuts may be stuck to the bolts that go into the engine block. If this happens, you are likely to unscrew the bolt from the block. This isn’t a big deal, just take your time and don’t damage the soft aluminum block. Use your extension to get the nut on the back side of the TAM.
Step 5
Remove the old TAM. If you’re lucky, it will lift right off with no problems. Otherwise, you may have to carefully pry it off. Also, you may be able to loosen it by carefully raising or lowering the engine slightly.
Pic: TAM removed. You can see that one of my bolts came out of the block.
Installation
Step 1
Put the new TAM in place. If you have troubles getting it on, you’ll likely need to raise or lower the engine slightly so that everything lines up. You may also have to gently pull the engine toward the TAM location.
Step 2
Put the nuts/bolts back on. Start them with your fingers, ESPECIALLY if you have to screw bolts back in. You do not want to cross-thread the bolt into the aluminum block and damage the block! Once you’ve got them in fairly far, tighten them up. They do not need to be super-tight, but fairly tight. If you have a torque wrench, tighten the 5 nuts to 37 ft/lbs.
Step 3
Remove the jack – you’re done. I’d lower the jack slowly, in case you screwed something up!
(optional): Flathead screwdriver or other prying device, and a rag
Removal
Step 1
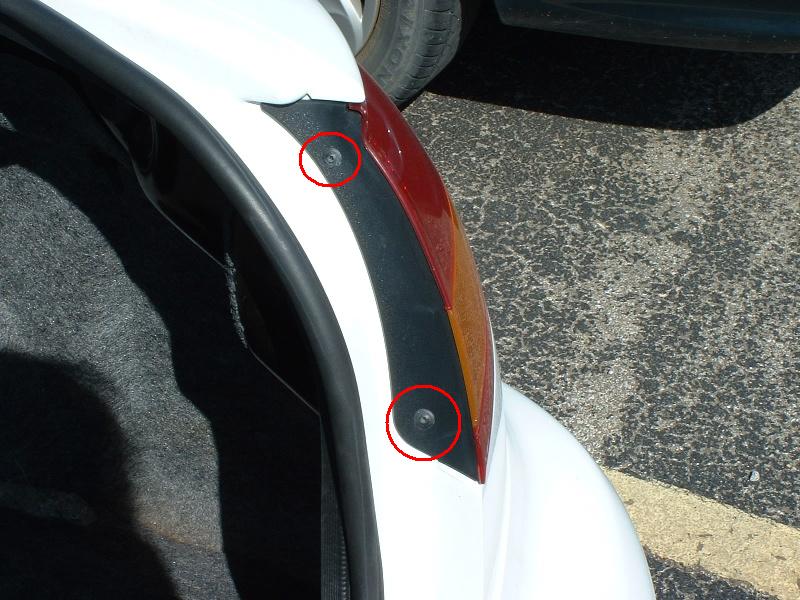
Open the trunk.
Step 2
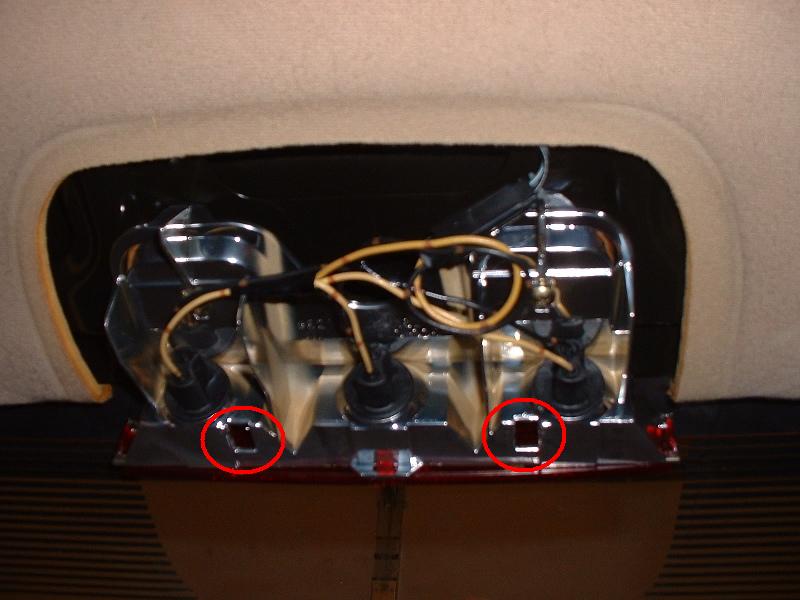
Remove the 2 torx screws. Normal thread (counter-clockwise to loosen)
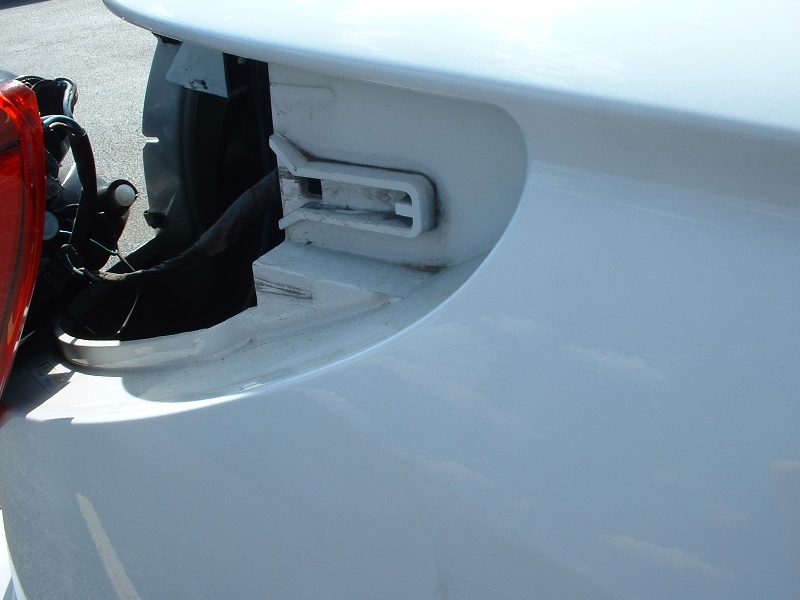
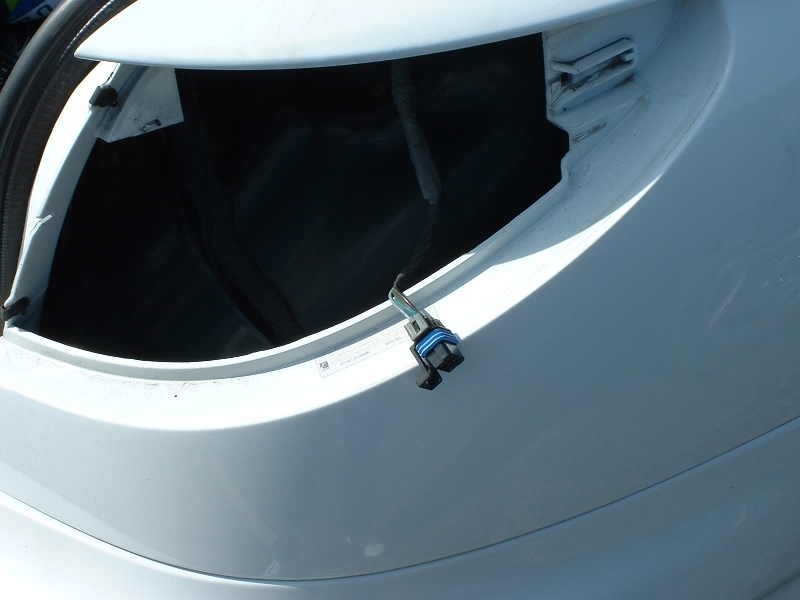
Step 3
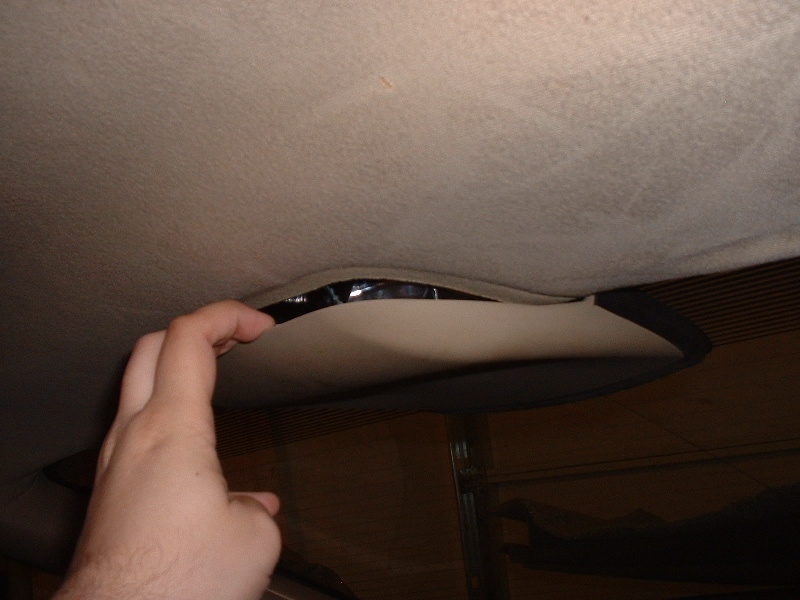
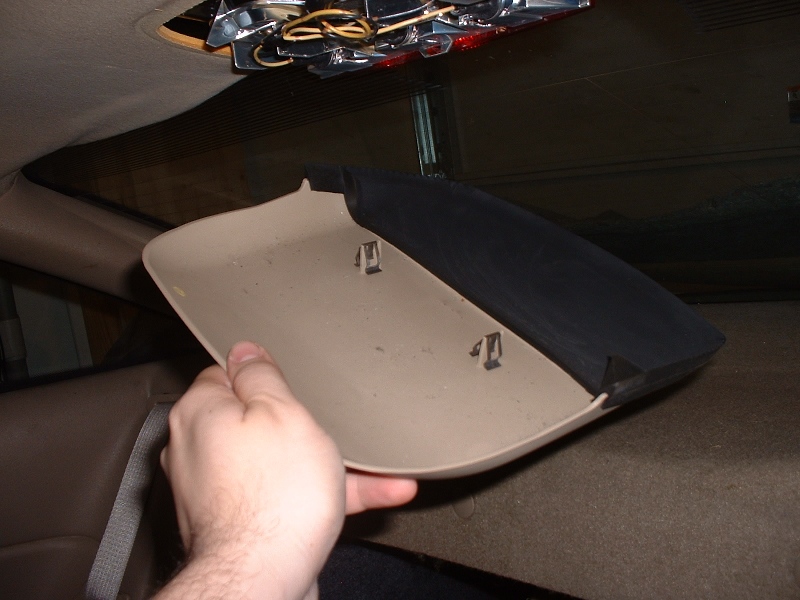
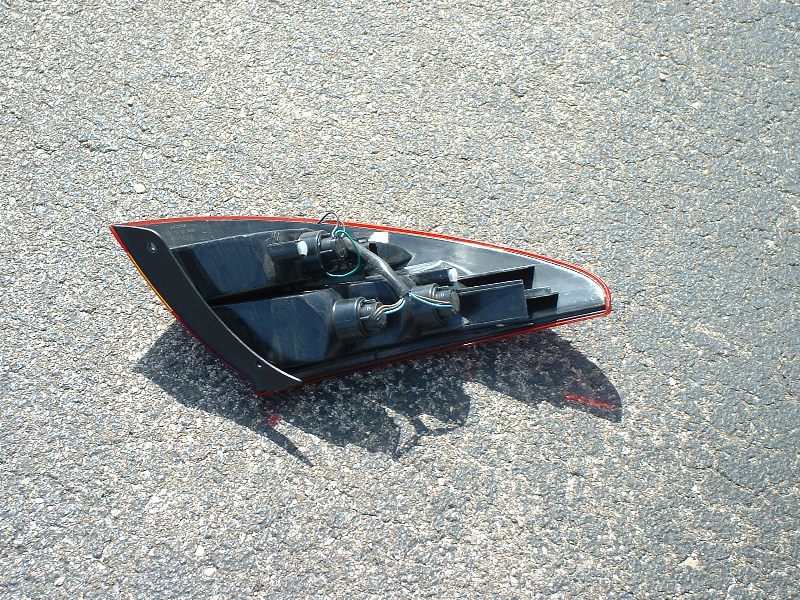
Slide the assembly straight back. The front end of the assembly is just held in place with a bracket that it slides into, so pulling straight back will detach the whole assembly, aside from the wires still connected. You can probably get the assembly out with your hands, but it can be difficult to get a good grip on the light to pull it out. If you can’t get it out, use a flathead screwdriver or other prying device with a rag over the end (to prevent scratching) and gently pop it loose.
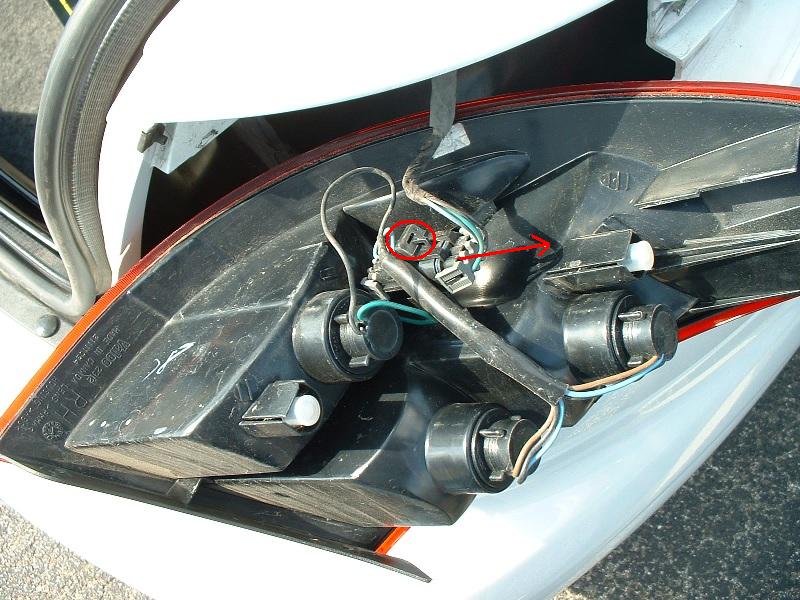
Step 4
Unhook the wiring harness. Use your fingers or thumb to lift up on the tab (circled) and pull the harness out.
Removing Bulbs
Twist the bulb socket counter-clockwise to release, clockwise to lock back into place.
Installation
Installation is reverse of removal. Make sure to line up the slide bracket.