The procedure should be exactly the same as shown for all ’97-’00 coupes, extremely similar for 01-02 coupes, and pretty similar for other S-Series models.
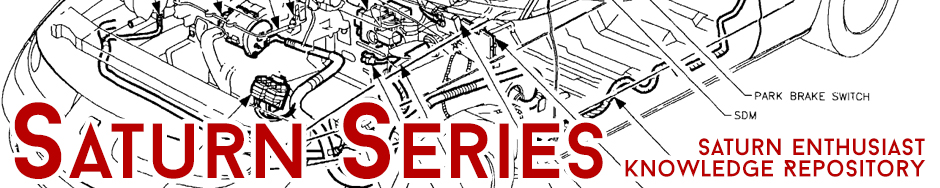
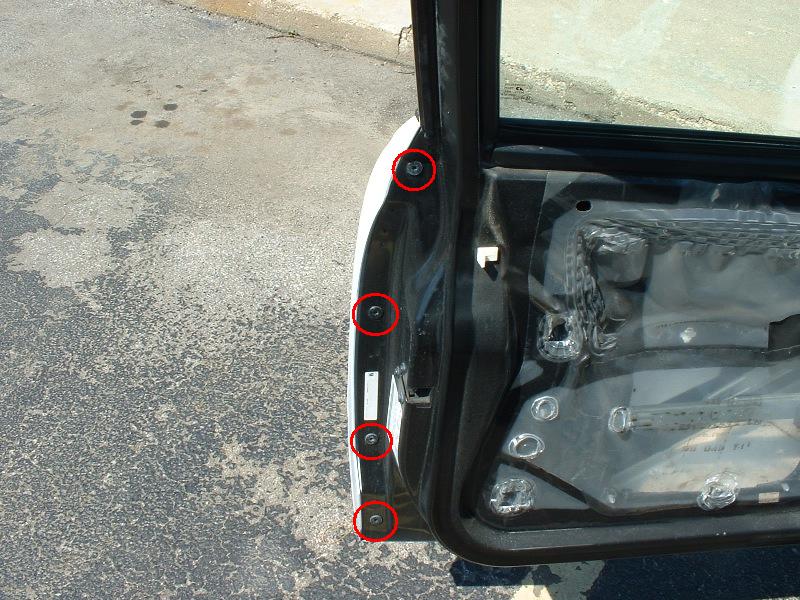
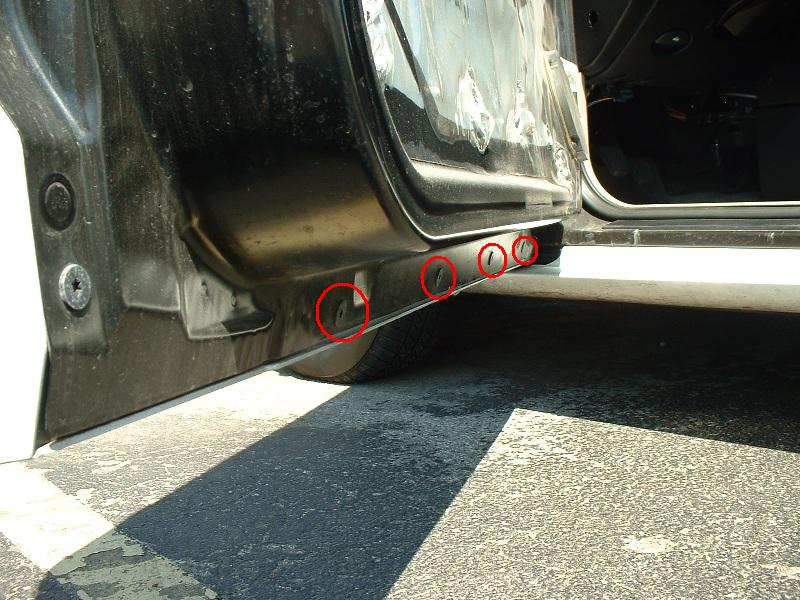
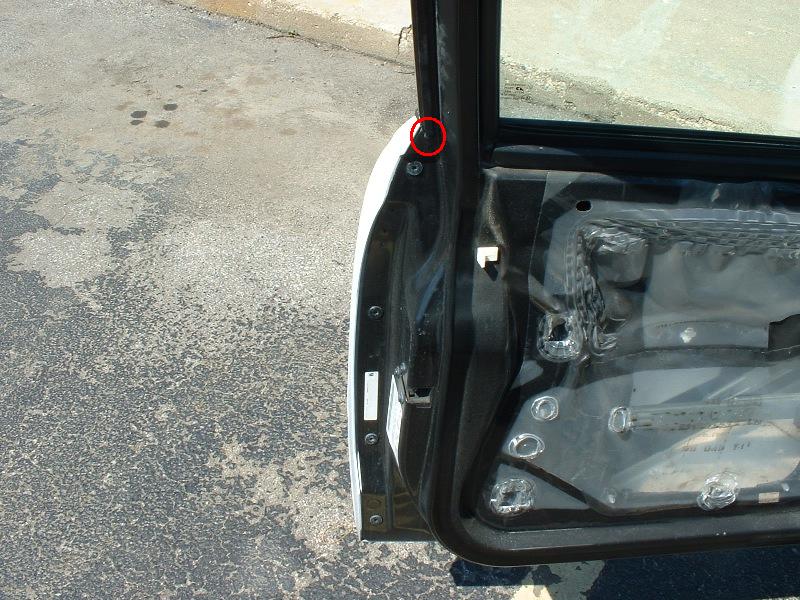
Remove 10 torx screws. They will be in tight, so you’ll need the leverage of a ratchet most likely. I was not able to loosen mine with a torx screwdriver. You’ll need a T27 torx bit, and an extension helps a lot for the 2 at the front end of the door.
Step 5
Remove small torx screw. Use the T15 socket or screwdriver.
Step 6
Remove trim end piece. You can probably pop it out with your fingers. If not, use a flat-head screwdriver.
Step 7
Remove trim. Just pry it up bit by bit with a screwdriver. I recommend putting a rag over the end to prevent scratching your paint.
Step 8
Remove panel. Close the door and wiggle it off. You’re done! To access just about anything in the door, just peel back part of the black covering.
Installation
Installation is pretty much the reverse of removal. When you put the door panel on, be sure to line up the lock with the lock hole. When I first reattached the panel on my car, the lock pushed the black ring partially out, and I had to remove the panel again.
Warm up the engine. Warm oil will flow out of the engine better than cold, so take the car for a quick drive to warm it up.
Step 2
Raise the front end. Ramps are really nice for this, or use a jack and jackstands. Be sure to set the e-brake, and preferably use some wheel chocks on the rear (whether on ramps or stands). NEVER work under a car that is only supported by a jack. I don’t want to hear any stories of squished Saturn owners.
Step 3
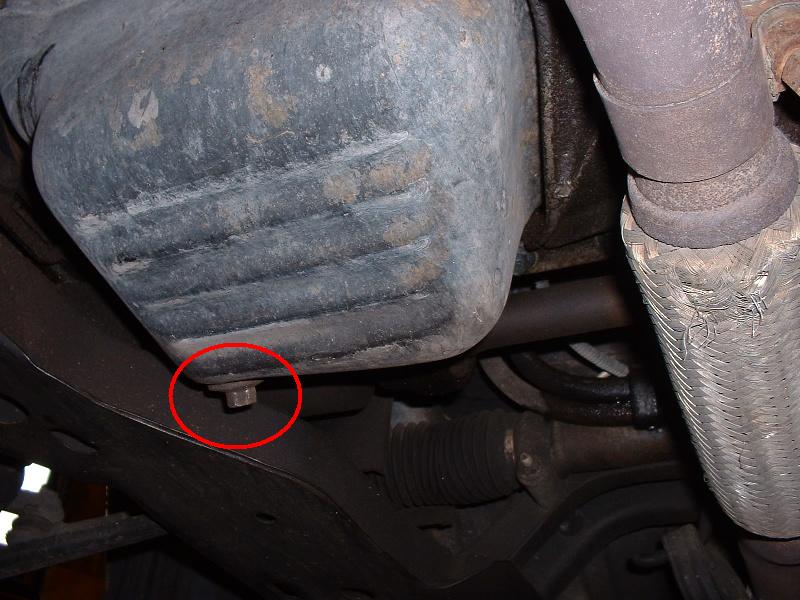
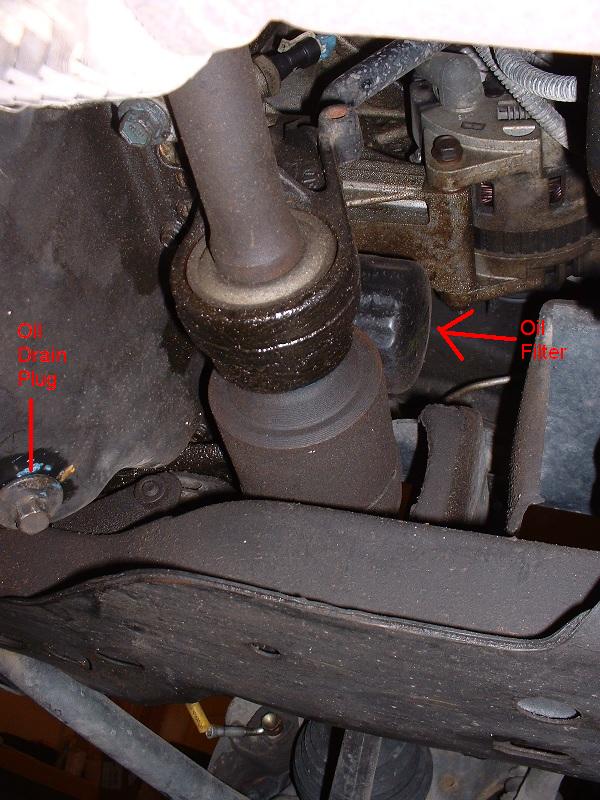
Drain the oil from the pan. The drain bolt is on the rear of the oil pan, which is one the passenger side of the car. A 14mm socket will loosen the drain bolt, be sure to have a pan underneath to catch the oil. Account for flowing oil that will arc out of the pan, as well as dribbling oil when it’s mostly empty when placing the pan. The bolt is normally threaded (lefty loosey, righty tighty, aka: clockwise to tighten, counter-clockwise to loosen).
Step 4
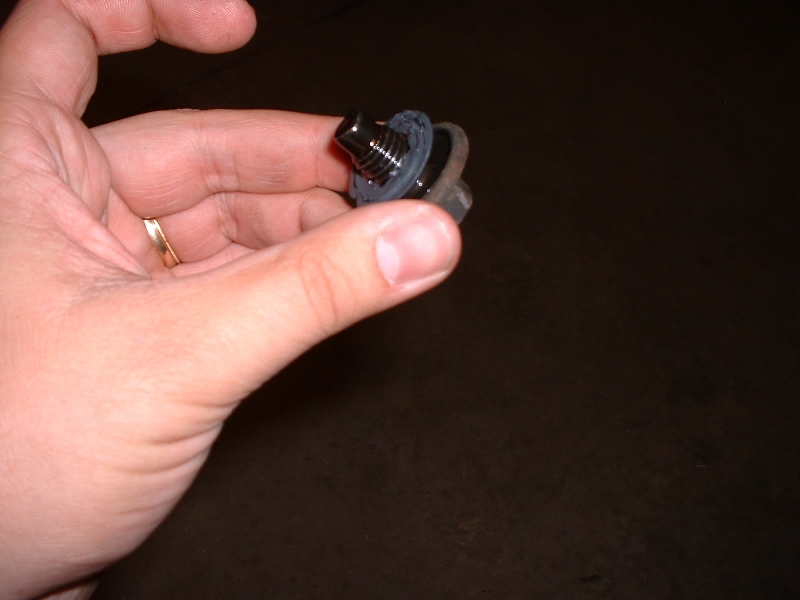
Reinstall the drain bolt. Make sure it has the round rubber gasket on it, and take a moment to wipe the bolt threads off, and wipe the area around the drain hole as well. Clean parts are less likely to bind up and/or leak. Snug the bolt nice & tight, but no need to go crazy on it.
Step 5
Remove the oil filter. You may be able to do this by hand, but it’s pretty likely that you’ll need a wrench of some sort. I use the kind that cups over the end of the filter and attaches to a ratchet, but a strap kind works too. The filter will be full of oil, so be ready to set it somewhere to drain. The oil will dribble/pour down onto the engine cradle and make a mess, this is normal, though there are tricks to getting around it if you want to take the extra time. It doesn’t really hurt anything, just gets things dirty. The oil filter is also normally threaded.
Step 6
Install the new oil filter. Make sure that the gasket from the old filter came off, as they’ve been known to occasionally come off and stay behind, which can easily cause a bad leak that can ruin the engine. Dab the new filter’s seal in some oil to help it seal, and spin it on. It should require spinning around a number of times before it is tight, if it only turns a few times, it could be a sign that you’re cross-threading the filter on, or some other problem. No need to use a filter wrench when tightening, just get it good & snug with your hand (unless it is now super-slippery because you got oil all over your hand).
Step 7
Refill the oil. I’ve always found that 4qt will get the level into the hatch marks on the dipstick, so throw 4 in for now. Fill through the oil fill hole on top of the engine. Once you’ve got some oil pouring/poured in, take a glance under the car for leaks.
Step 8
Put the car back on the ground. Get it off the ramps or jackstands or whatever, onto level ground. It’s ok if you have to run the car a little to do this, as long as you put the 4qts of oil into it already. It won’t hurt anything if it’s a tad low.
Step 9
Top off the oil. If you didn’t run the car to get it off of ramps, go ahead & start it up for half a minute or so, then shut it off and wait a couple minutes so the oil can settle back into the pan. Pull the dipstick, wipe it off, put it back in all the way, pull it out again and check the oil level. Add oil as needed. From the bottom to the top of the hatch marks is 1qt, to give you an idea of how much you’ll need to add if it’s off. Do not overfill. Take another glance to be sure you don’t see any leaks.
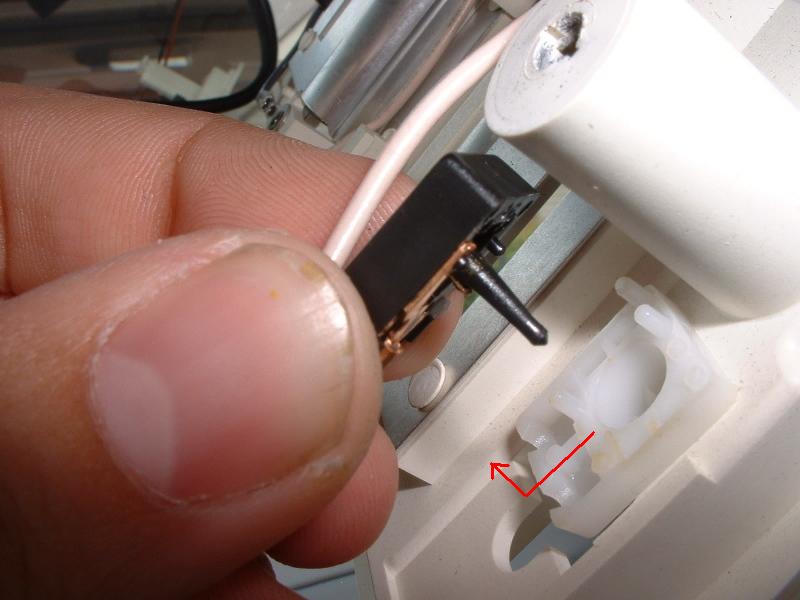
One evening, I pushed the button to one of my map lights… a little harder than usual. It turned on, but the button no longer worked. I had pushed it up too hard, and something had come loose. Turned out to be an easy fix…
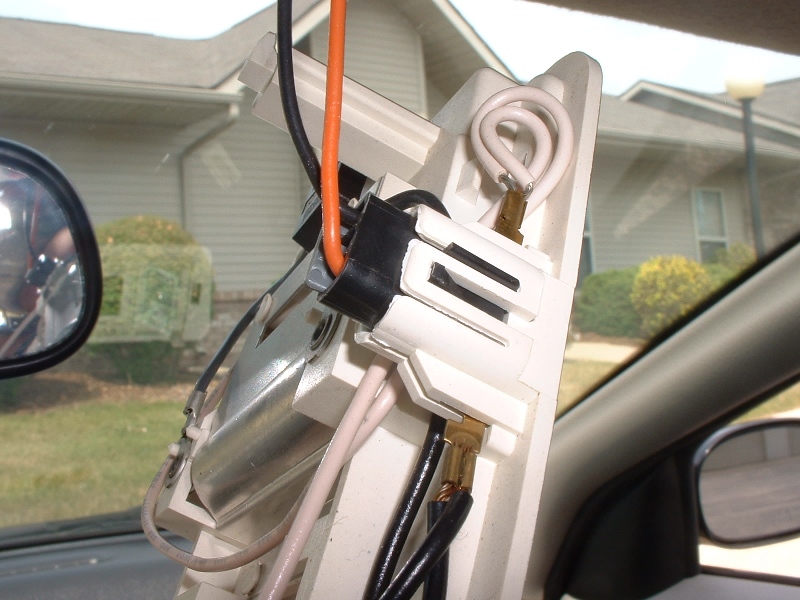
WARNING: as you remove the dome light assembly, watch for very small loose parts.
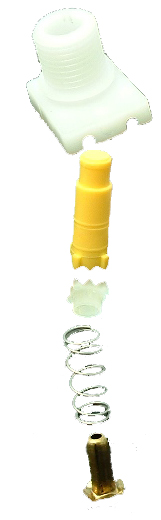
Collect your parts. You need to have everything below (1st picture), plus the black switch base which is still connected to the map light frame (2nd picture). The white piece is still likely also still on the map light frame, but it can be easily unclipped (2nd picture).
Step 6
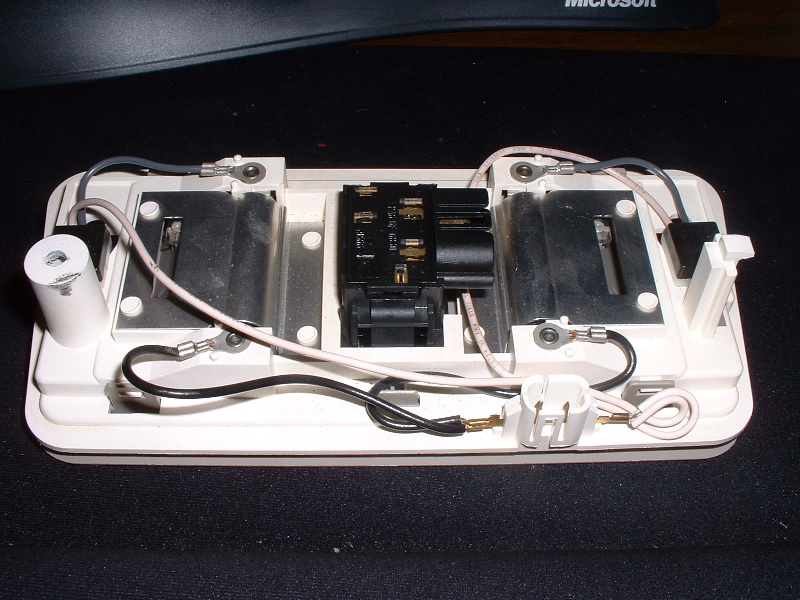
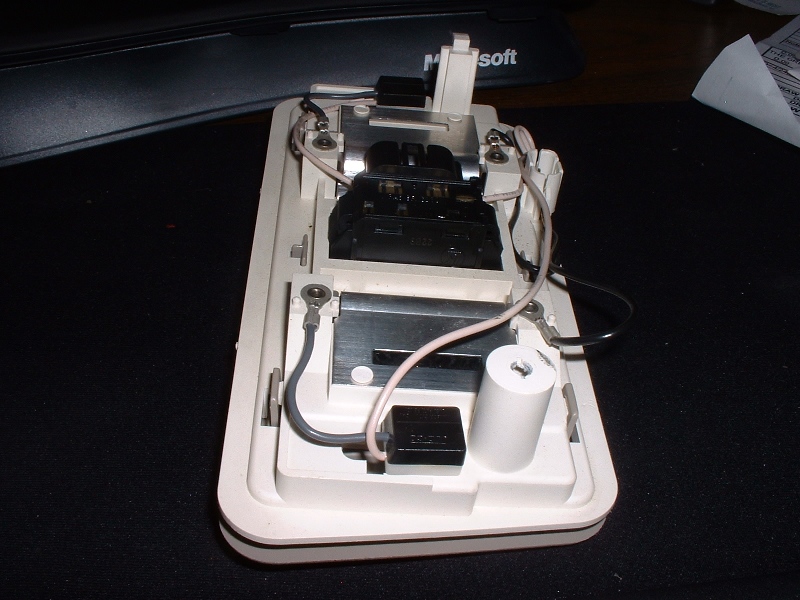
Reassemble the parts. Leave the button cover out for now. The small white part has grooves that line up with grooves in the metal part. The order & direction of the parts is shown below. With the parts in the right direction, assemble with the black piece.
Step 7 (Optional)
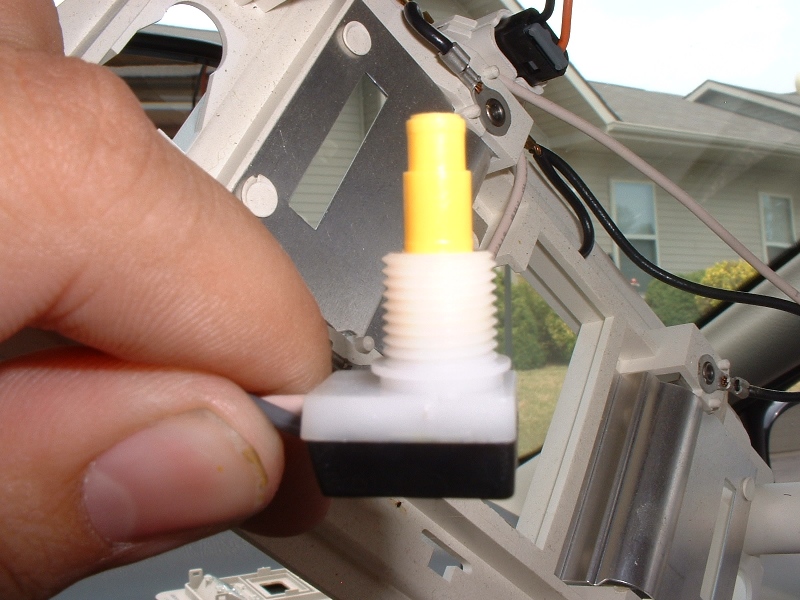
Wrap the 2 base pieces with electrical tape. I found that once my switch had come apart once, it wanted to come apart more easily a second time. To prevent this, I wrapped the white & black pieces a few times with electrical tape, in a diagonal direction. I didn’t get a picture of this, sorry.
Step 8
Snap the switch back into place, plug the wiring harness back in, and test.
Pop the bulb loose. It’s just a wedged-in bulb, so you can just pop it loose with your fingers (it’ll be HOT if it were lit recently), or a screwdriver or something.
Installation
Step 1
Wedge the bulb in. Wipe down & hold the bulb with the rag – oil from your hands will make it burn out prematurely. Direction doesn’t matter, just seat the metal ends of the bulb in the notches on each end.
Step 2
Test it. Clicky, clicky.
Step 3
Reinstall the map light cover. It just clicks back into place.
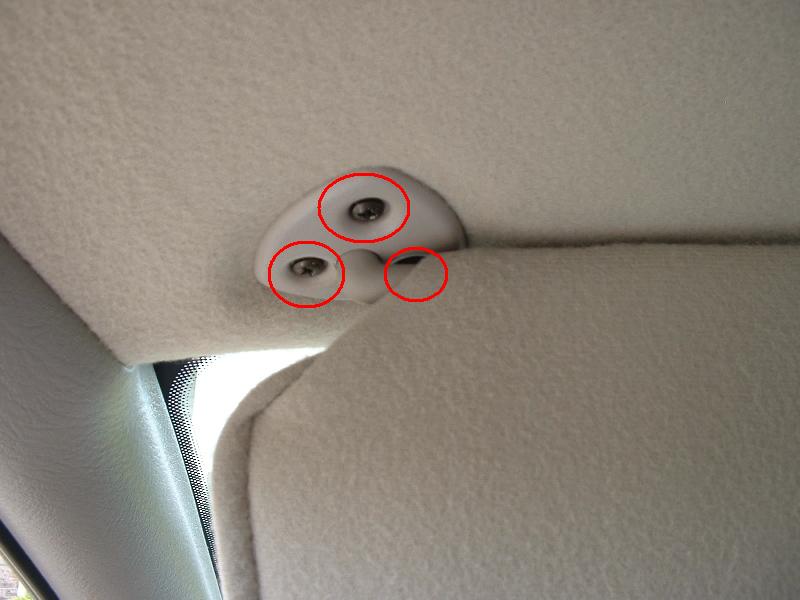
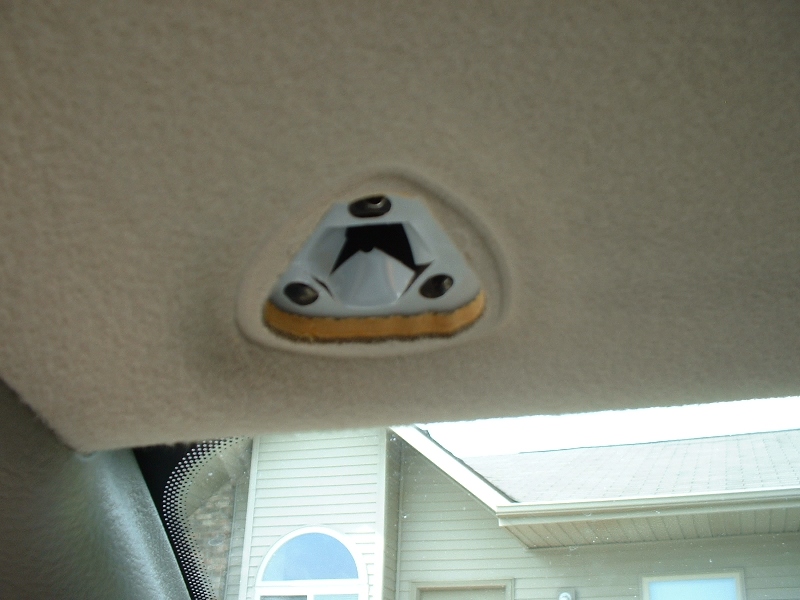
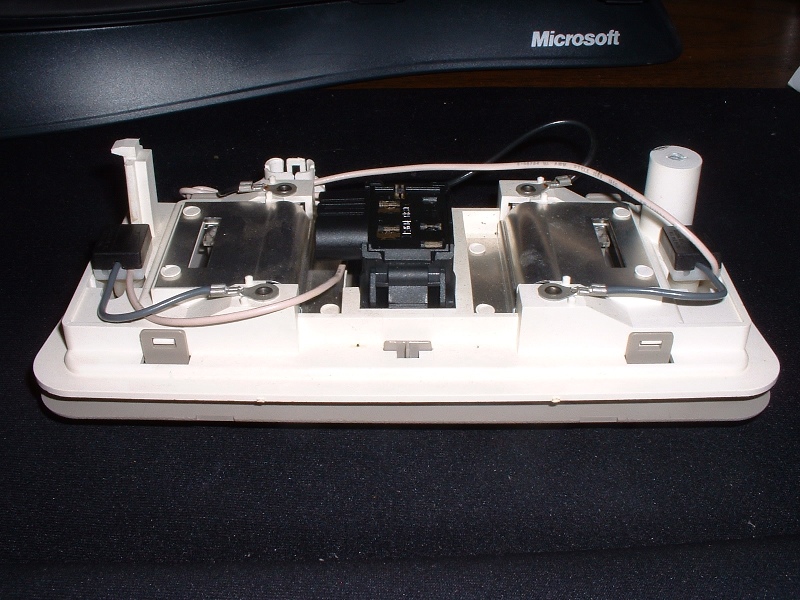
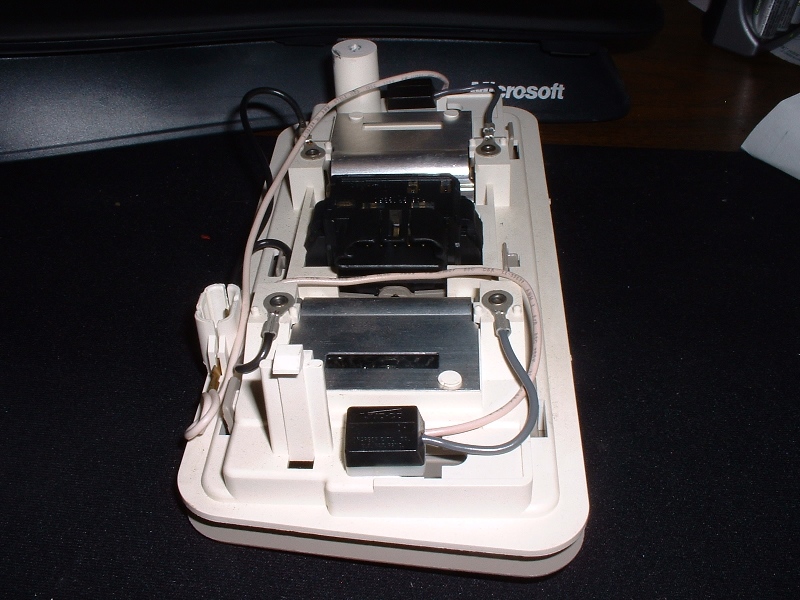
Remove four screws. Three at the swivel point, and one for the clip. Everything should come loose.
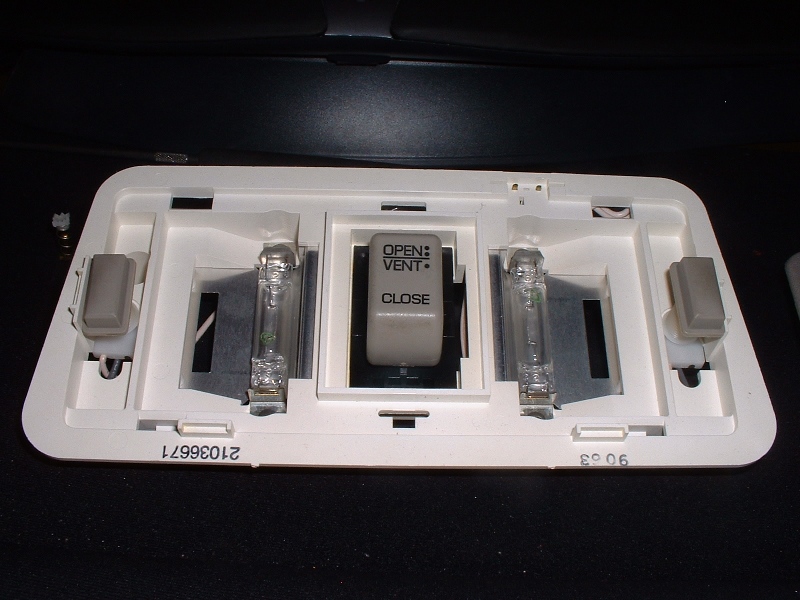
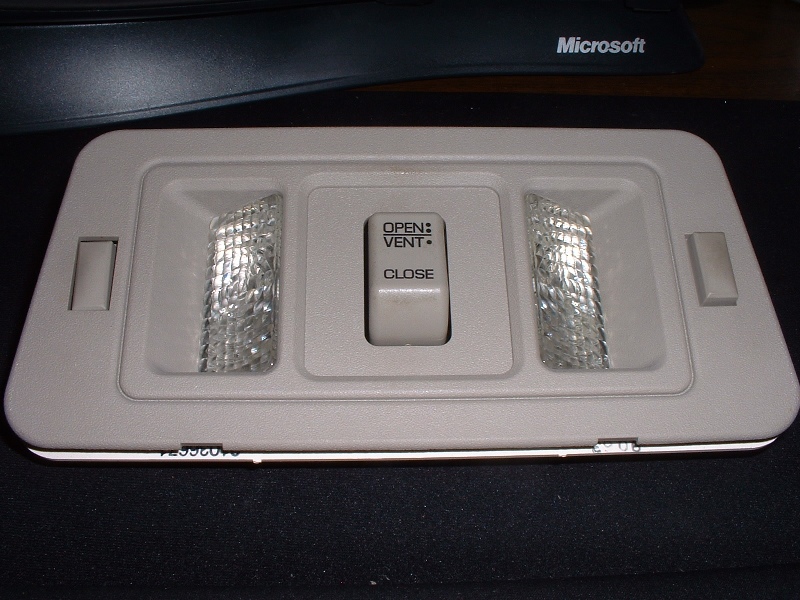
Here’s what it looks like after it is uninstalled (just ignore the dangling map lights in the second picture).
Installation
Step 1
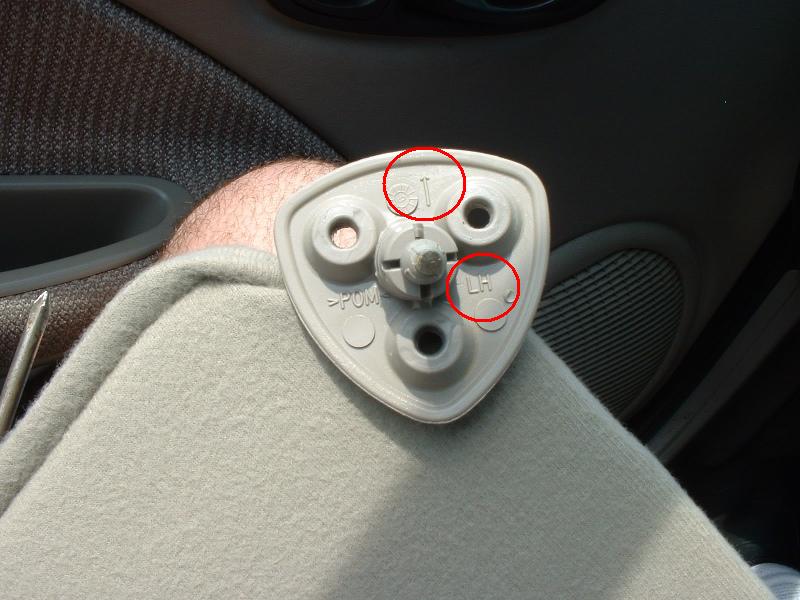
Line up the arrow. On the top side of the triangular plastic mount, there is an arrow. The arrow should point toward the front of the car.
Also, each triangular mount is identified with the side of the car it goes to: LH = driver’s side RH = passenger side.
Step 2
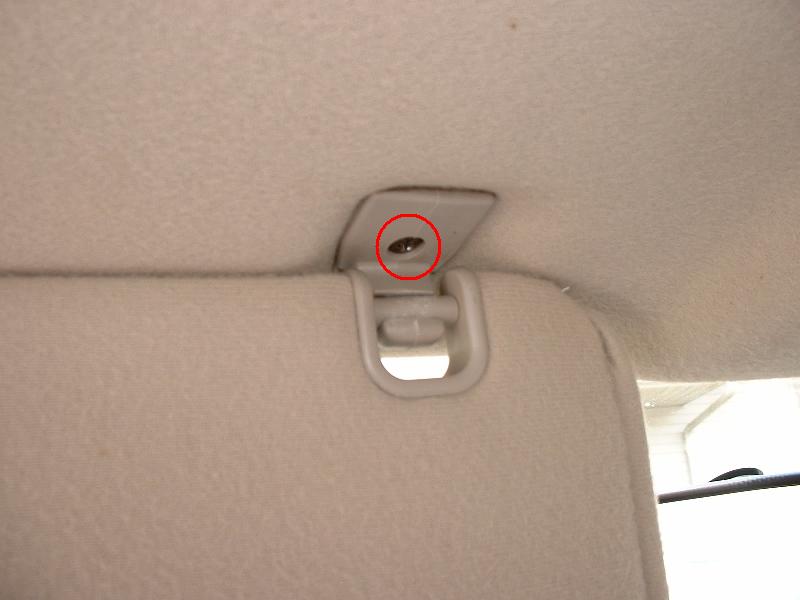
Install four screws. All four screws are the same. Three go in the triangular mounting point, the fourth goes into the clip for the other end of the visor.
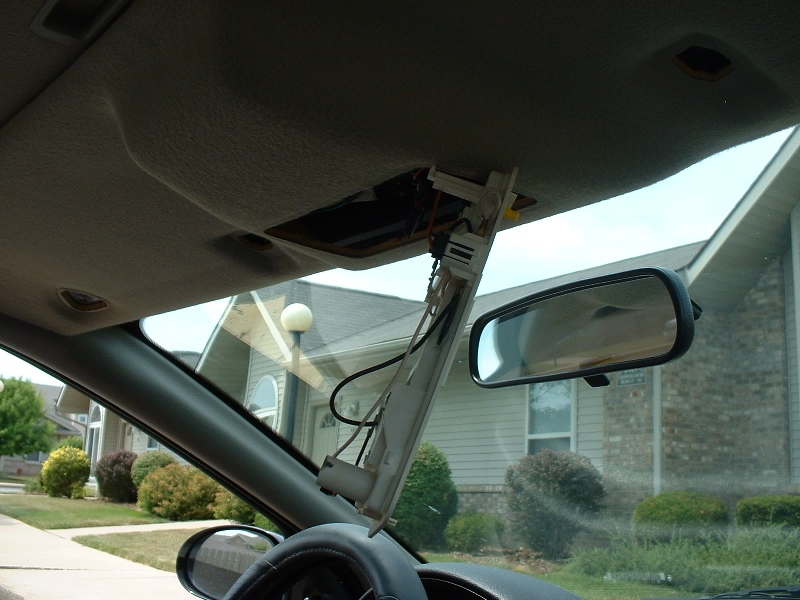
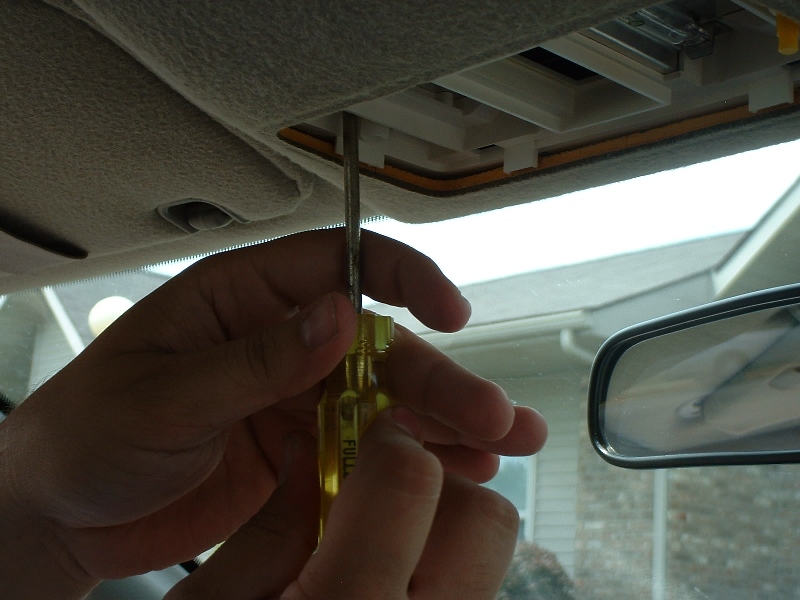
This may not be absolutely necessary, but the wiring for this switch is fairly tight, so it’s probably easier to just take it out first.
Step 4
Remove one phillips screw on the driver’s side. You’ll probably have to look almost straight up to notice it, but it’s there.
Step 5
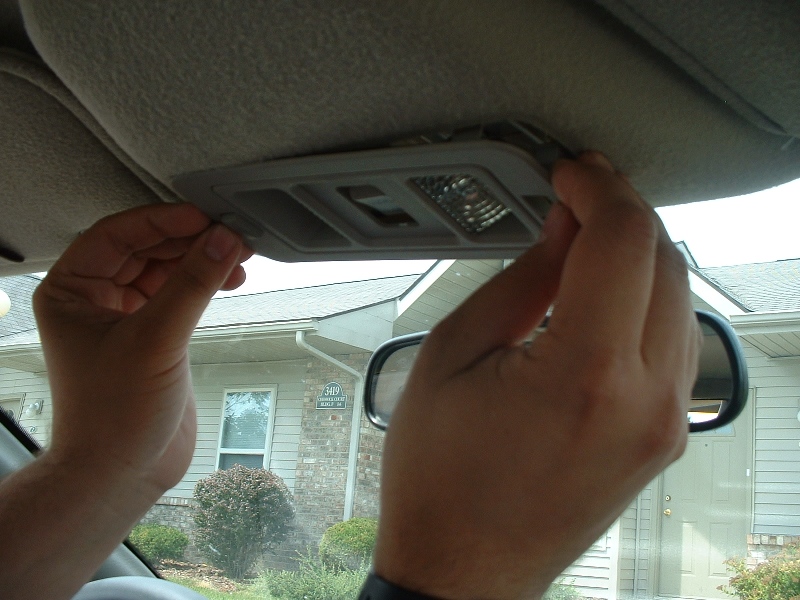
Wiggle the assembly out of the headliner. GENTLY pull down a bit on the headliner to get enough clearance to twist & angle the piece out. There will be some wires attached.
Step 6
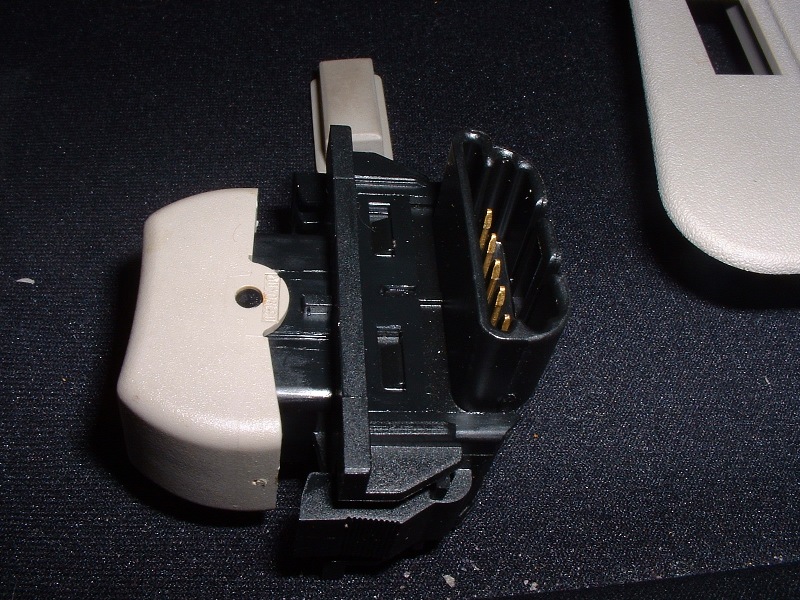
Unplug the wiring harness. You’ll have to pry the clip to get it to release.
Sorry, this is just a placeholder post – we need someone to build this guide! Click the button above if you’d like to contact us about building & submitting this guide.
Sorry, this is just a placeholder post – we need someone to build this guide! Click the button above if you’d like to contact us about building & submitting this guide.
If you want to remove the rear seat cushions, you do not need to remove the rear console separately. The entire rear seat base, cushions and console, come out together. See this related guide for removing the whole rear seat base.
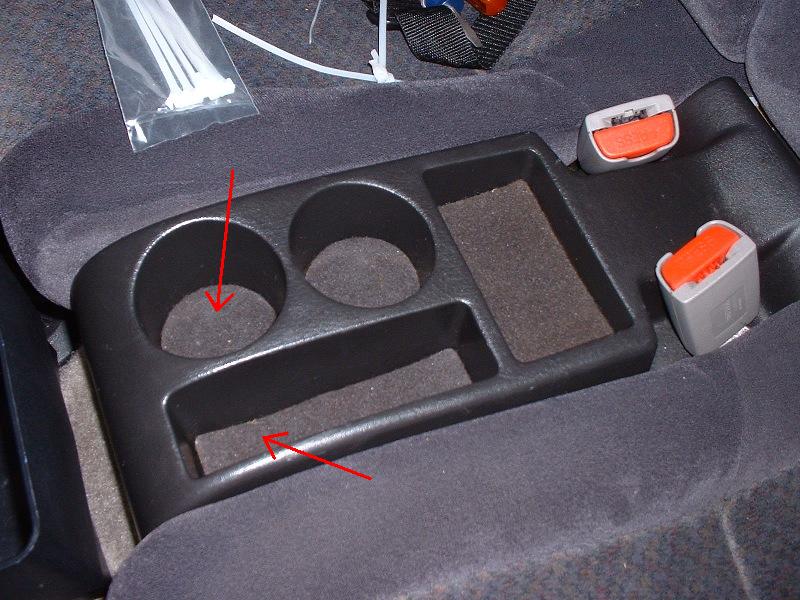
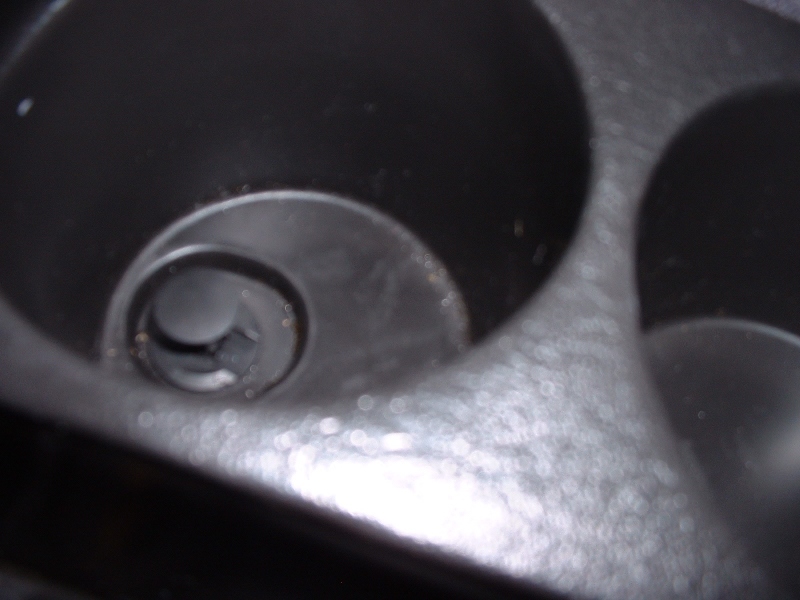
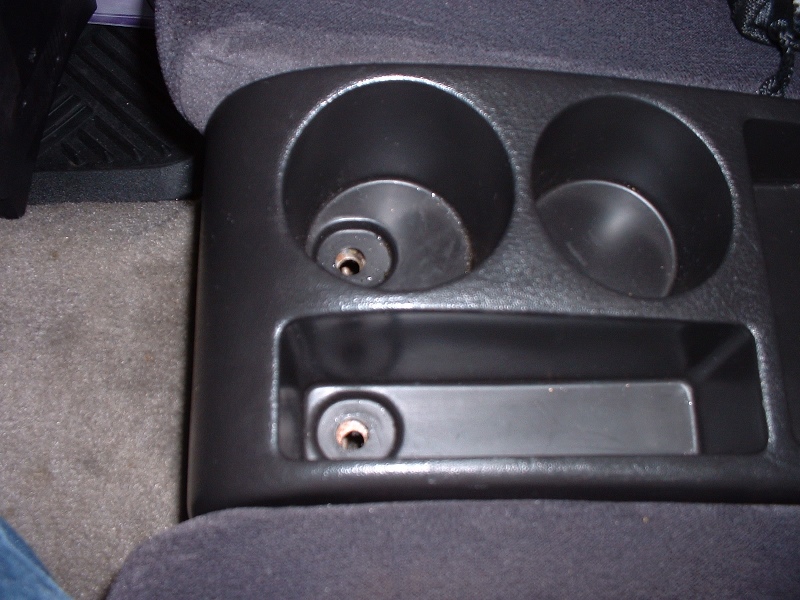
Remove bin liners. Take out the carpet pieces from the front cupholder and the long skinny slot
Step 2
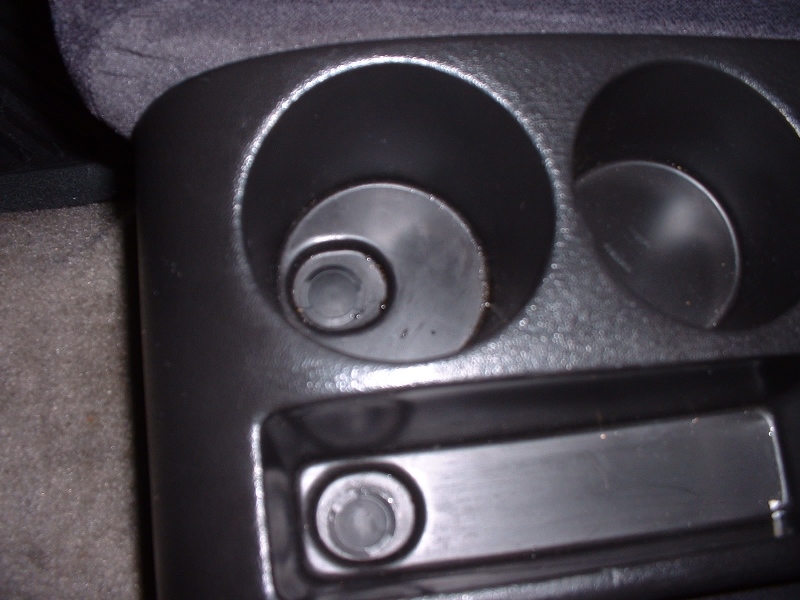
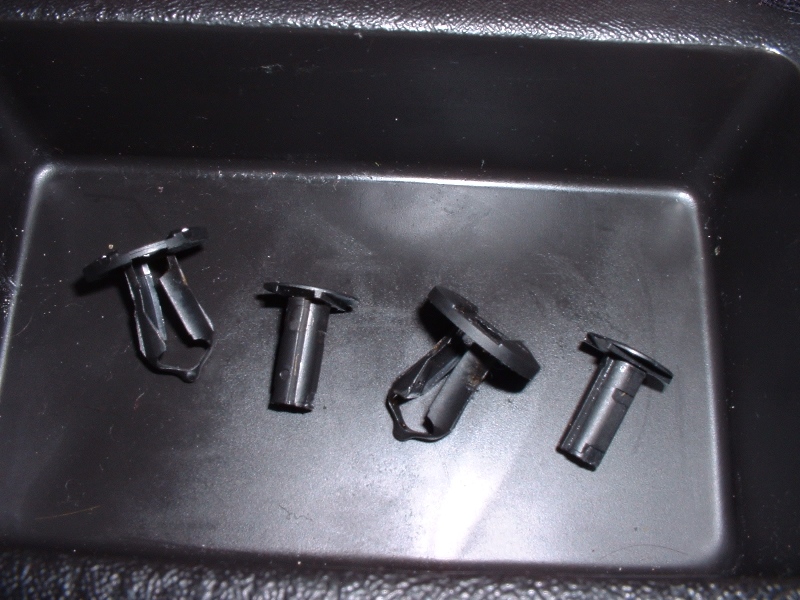
Pry out the center pegs. Use the flat-head screwdriver and pry up where the notches let you get under the center peg. Take the center pegs all the way out.
This is a mod I did in my ’99 SC1 to have a trash bin in the car without it taking up rear seat legroom, and not having something that will roll right off the rear floor hump.
(Unfortunately a lot of the photos for this guide have corrupted.)
Install magnet in rear center console. Original plans had magnets glued to the inside of the plastic of the console, but the magnets I was using at that point were too weak. My final design uses a magnet that I pulled out of a really old computer hard drive, which was very, very strong. So strong that it would’ve taken some serious glue to make it hold. Instead, since it had a couple of screw holes, I decided to zip-tie it to the metal frame of the rear seat assembly.
Step 3
Reinstall console.
Step 4
Align to trash bin. You have to figure out what the magnet is going to latch to on the trash bin. In my case, I had a second metal plate without a magnet that also came from the hard drive and matched up well with the magnet in the console. I test attached the plate, making sure it was plenty strong to handle quick turns and such. Once I was confident with it, I figured out where I needed my screw holes in my trash bin.
Step 5
Attach plate to trash bin. I used self-tapping screws, then chopped the ends off after piloting them in the first time. I had them go through the plastic and into a piece of rubber, just to make sure things wouldn’t catch on the ends of the screws.
Step 6
Test. I’m pretty sure it’s going to stay put. I’ll have to do some “road testing” tomorrow, though! To remove the trash bin, I just grab it and take it out. With the trash bin out, you can’t tell it’s not stock, because you can’t see any signs of the magnet inside the center console.