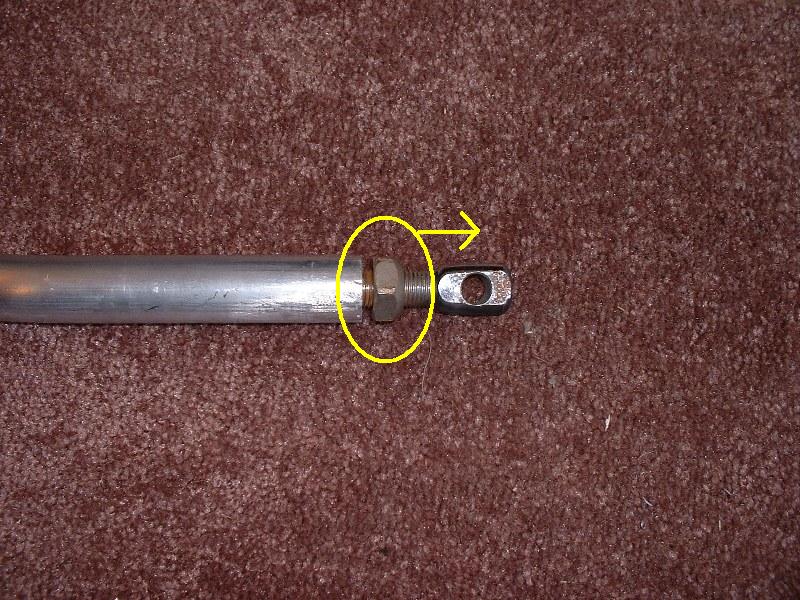
Note: pictures depict an adjustable strut bar. Installation instructions are for a non-adjustable 1-piece bar.
Step 1
Park the car on a flat, level surface and open the hood.
Step 2
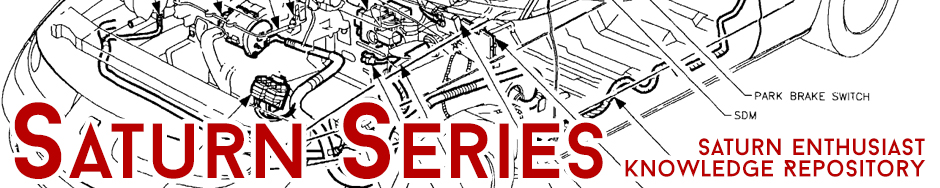
Remove the strut to body nuts. There are 3 of these on each side. They are 13mm, and the studs they are on may interfere if you use a shallow socket, so grab a deep one if you have it.
Step 3
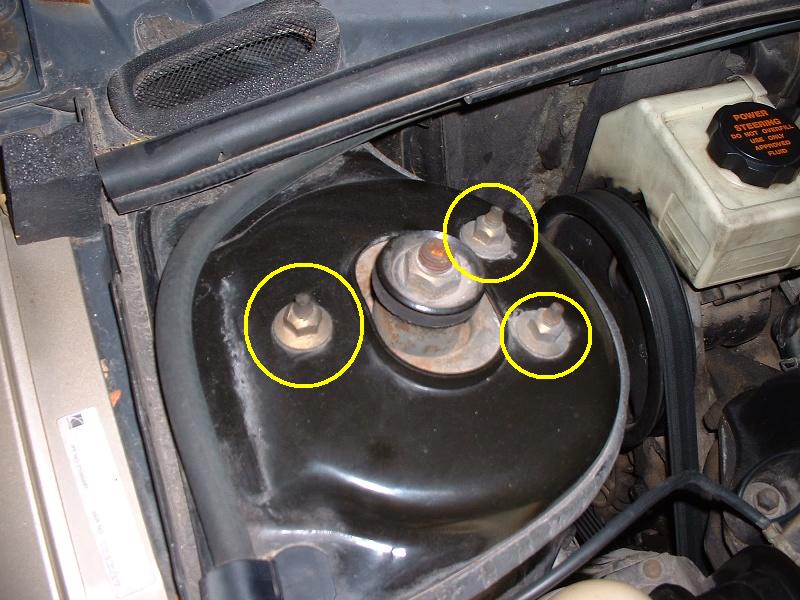
Place strut bar in place over strut studs.
Step 3
Tighten things up. The strut to body nuts need tighten them to 21 ft lbs. If you don’t have a torque wrench, 21 ft/lb is not very tight – just snug the nuts up. Over-tightening can result in snapping a stud.
Locking pliers or large hex keys (depending on your bar)
Wrenches (size depending on your bar)
Installation
Step 1
Park the car on a flat, level surface and open the hood.
Step 2
Remove the strut to body nuts. There are 3 of these on each side. They are 13mm, and the studs they are on may interfere if you use a shallow socket, so grab a deep one if you have it.
Step 3
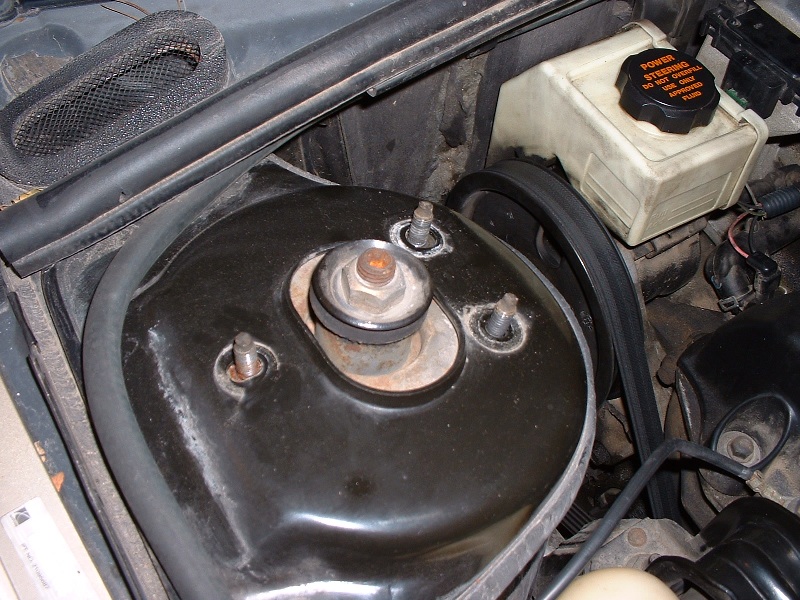
Remove the strut bar from its end brackets. This is for adjustment purposes – if your bar is already adjusted (for example if it came off another S-Series), then you can set the bar in place, and skip to step 8.
Step 4
Loosen the length adjustment nuts on each end of the bar. This will let the end links be loose so you can adjust the overall length of the bar.
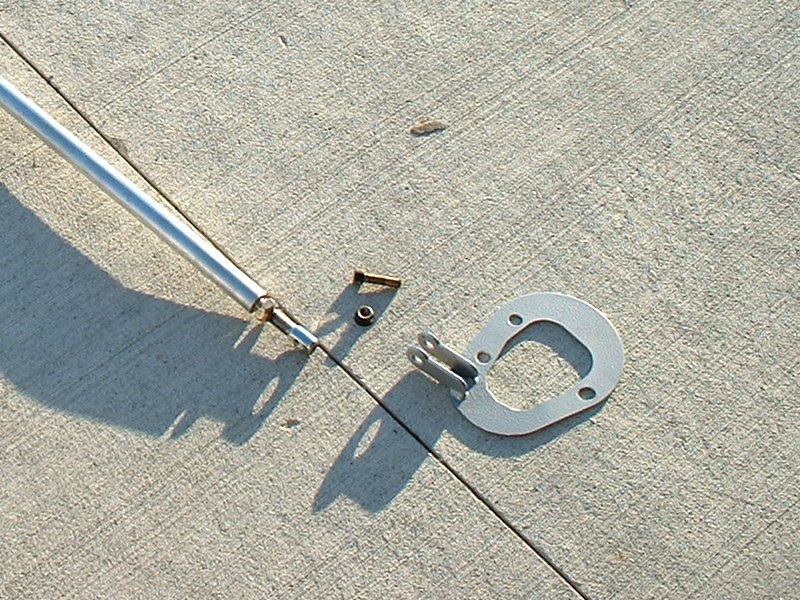
Step 5
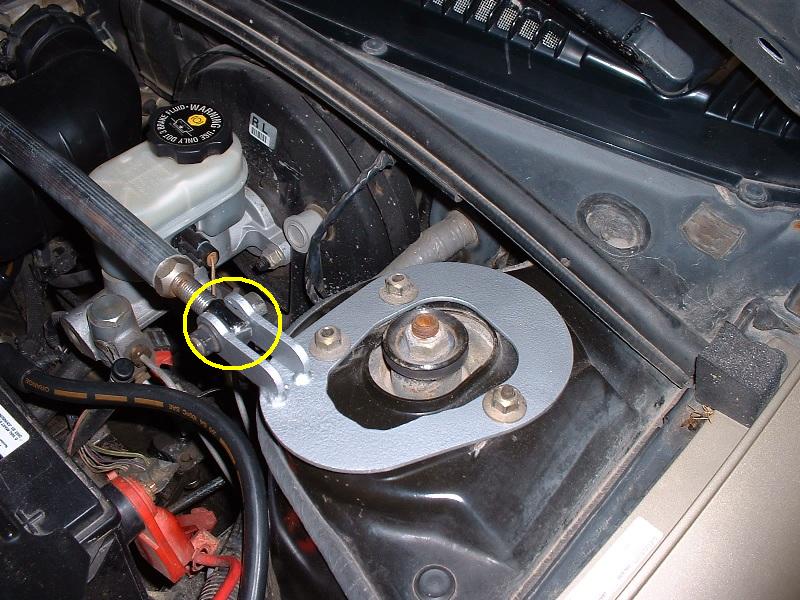
Install strut bar end brackets. Just hand-tighten the strut to body nuts for now.
Step 6
Loosely install one end of the bar to its end bracket.
Step 7
Adjust the bar length. Bit by bit, adjust each end link by spinning the loose end link, or spinning the whole bar to adjust the attached end link. It is likely that one end link will have reverse threads. By adjusting both, you can ensure the bar is centered, and that one end won’t be more loose than the other. Once the hole in the end link lines up with the end bracket, loosely attach it.
Step 8
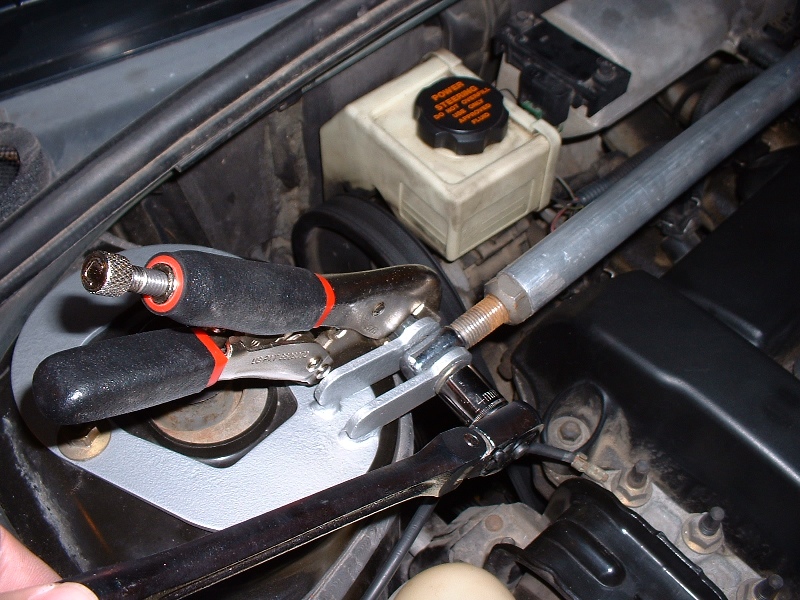
Tighten things up. Start with the strut to body nuts – tighten them to 21 ft lbs. If you don’t have a torque wrench, 21 ft/lb is not very tight – just snug the nuts up. Over-tightening can result in snapping a stud. With both struts tightened up, go ahead and tighten the nuts in the bar, both for attaching the end links, and for adjusting the length.
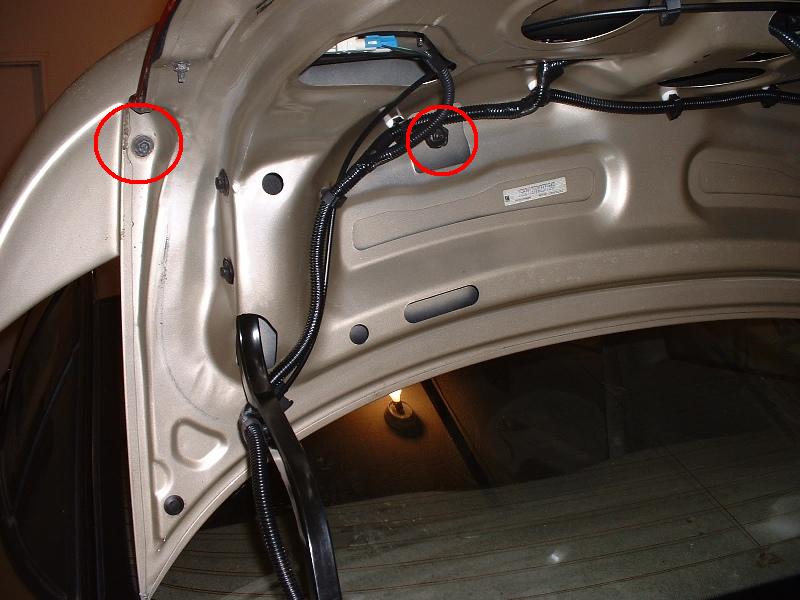
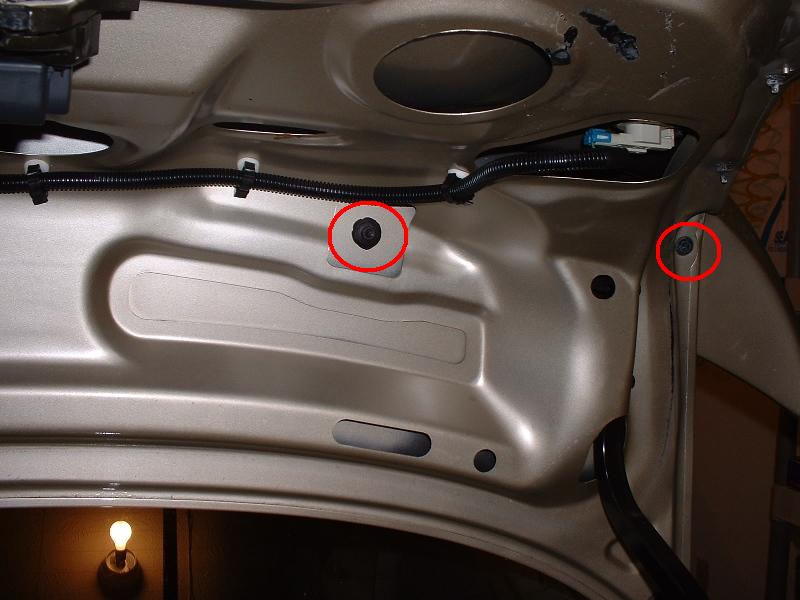
Remove 4 bolts. Use your 10mm socket and remove the 4 bolts circled below on the underside of the trunk lid. On the 2 inner ones, you may get just the nut, or both the nut and stud.
Step 3
Close the trunk lid.
Step 4
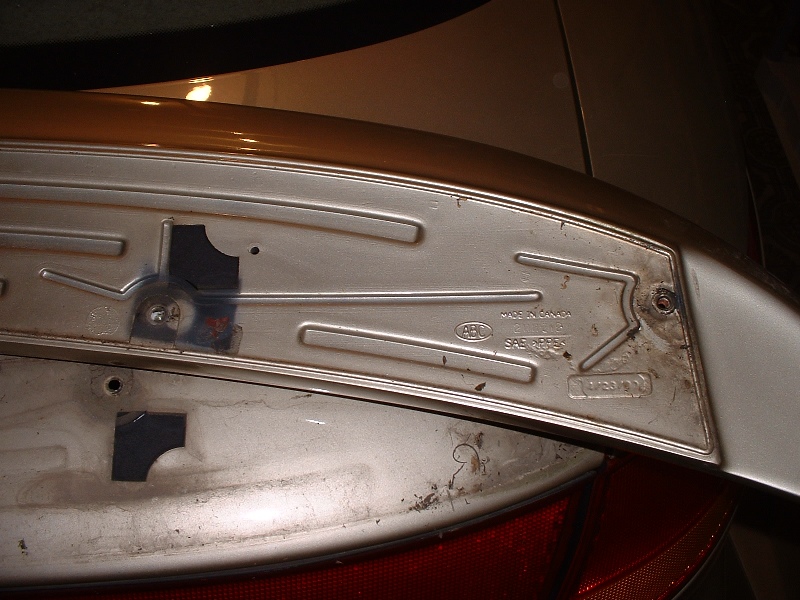
Pull up on each end of the spoiler. In addition to the 4 nuts/bolts, the spoiler is held on by 2 adhesive pads toward the center of the trunk lid. It shouldn’t be too hard to break free, but don’t be afraid to put some force into it. Once both of the adhesive pads pop free, the spoiler should be loose. It’s likely to be dirty underneith.
Installation
Line it up with the holes, and put the nuts/bolts back in. Consider replacing adhesive strips and/or using some loctite to ensure it doesn’t come loose.
I just swapped a set of 4 leather seats into my 2000 SC1. The seats are leather and came from a 1997 SL2.
I came across some issues that I didn’t expect, so thus, a quick picture tutorial.
This should prevent you from destroying your seats while trying to swap them. However, if you do destroy them, or cut a finger off, or something dumb like that, it’s your own fault, not mine.
Tools
1/2 drive 18mm socket and ratchet
E10 Socket, short extension and appropriate ratchet
Medium sized flatblade screwdriver
You might need:
Breaker bar
Air tools
Phillips screwdriver
Procedure
Step 1
First of all, the front seats. Supaaaa easy. I’ve heard they are held in place by a T50 torx bolt, but on my car, I needed an E10 socket to remove the bolts, which is the mating opposite of a T50….so, check. If the bolt is male, get the E10. There is one bolt under each corner of the seat, and it lifts out. Make sure to disconnect the driver’s side seatbelt harness.
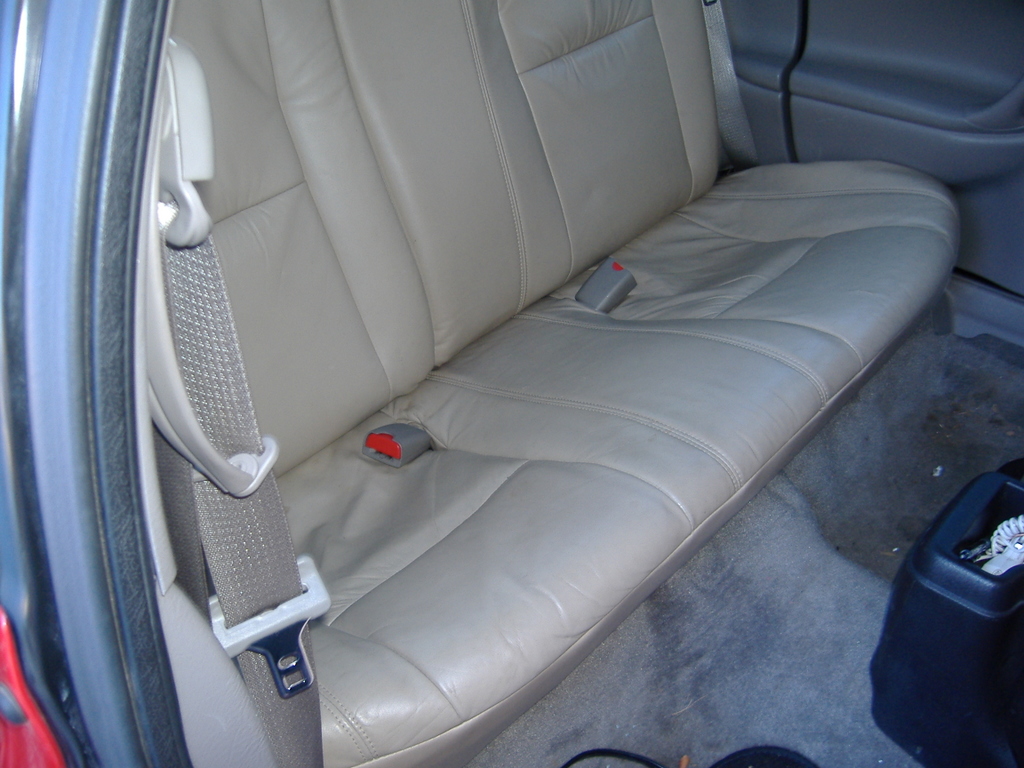
Step 2
Remove the rear seat by wiggling back and forth and lifting. Push the seat backs towards the middle of the car to release the outside rod, and then lift them out.
Step 3
Remove the plastic risers underneath the seats via 18mm socket. They’re on there pretty good…air tools are recommended. Switch to the appropriate riser, either coupe or sedan, and refasten the 18mm nuts. Attach the new seat bottom.
Step 4
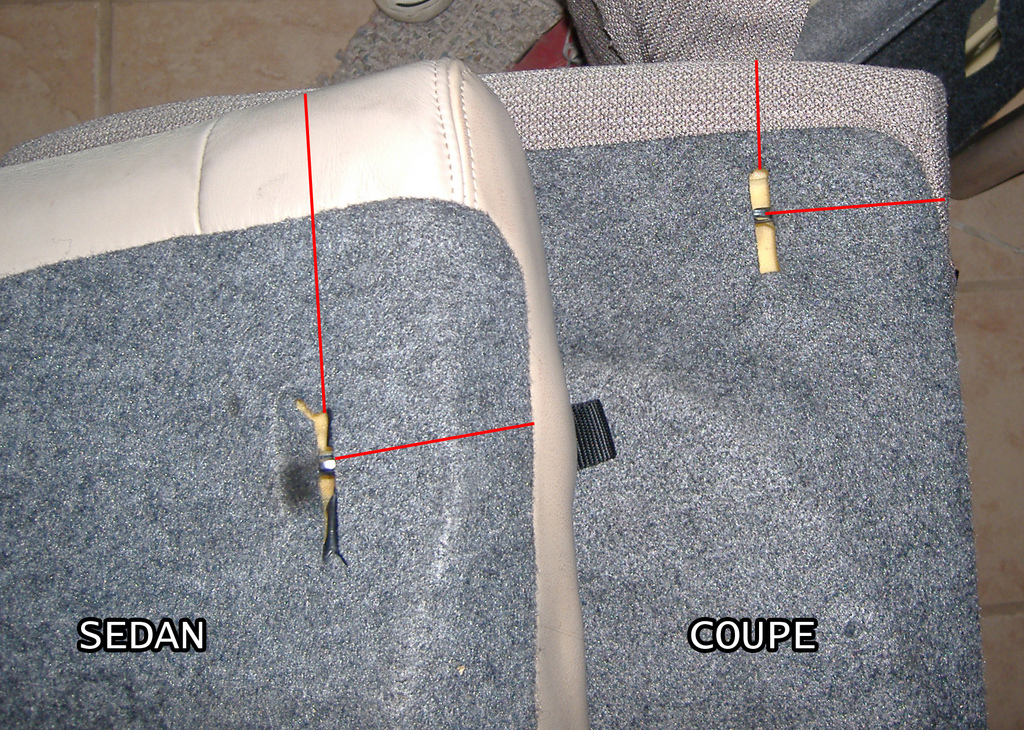
Problem arises when you notice that the latching positions are different from the sedans to the coupes…
The sedan backs are also slightly taller.
We’re going to swap the seat cores between the two seats so that they latch correctly.
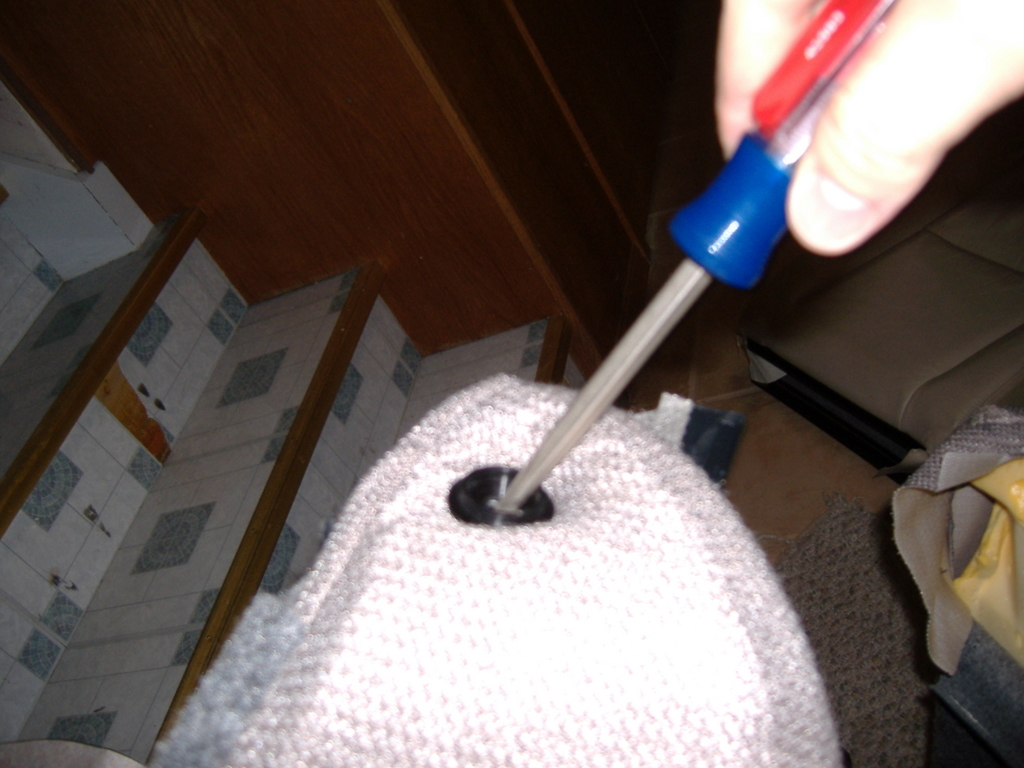
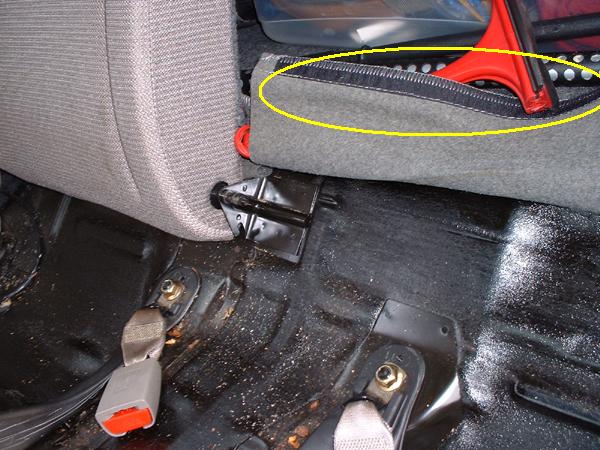
Begin by releasing the double J clip at the bottom of the picture. If your seat has a locking thingy, pop off the cover with a flatblade and remove it via the three phillips screws.
Step 5
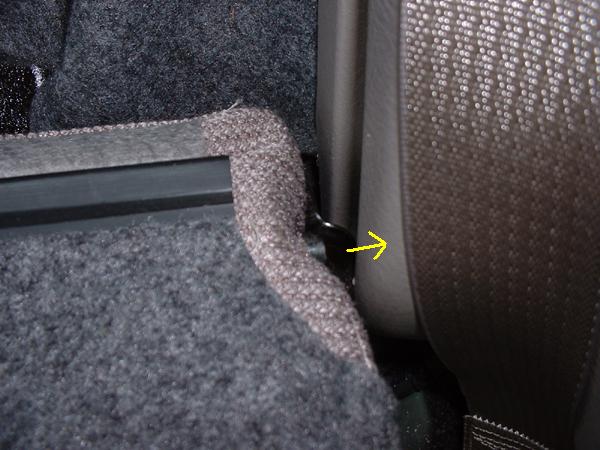
Remove the seat pivot bushing. The easiest way I found to do this is to put your flatblade in pretty shallow and just pry. It will pop out.
Step 6
Open the two rings at the bottom of the seat.
Step 7
Pop the staples out of corners, revealing them.
Step 8
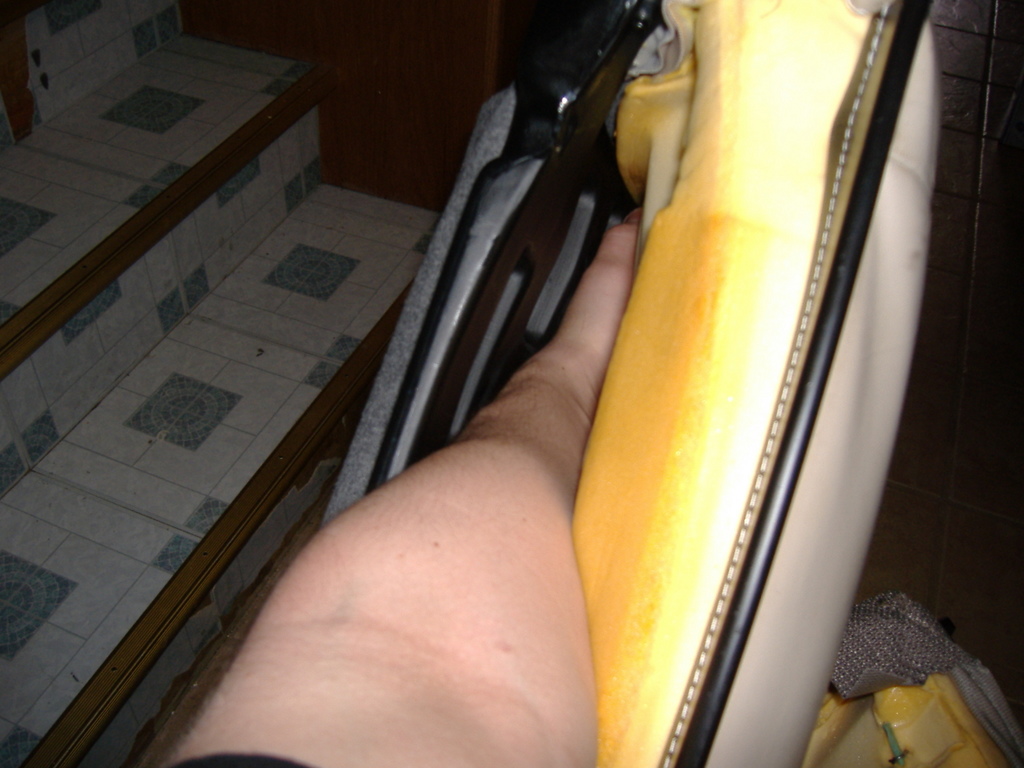
Pull the rod out of the fabric and get the core out as much as you can.
Step 9
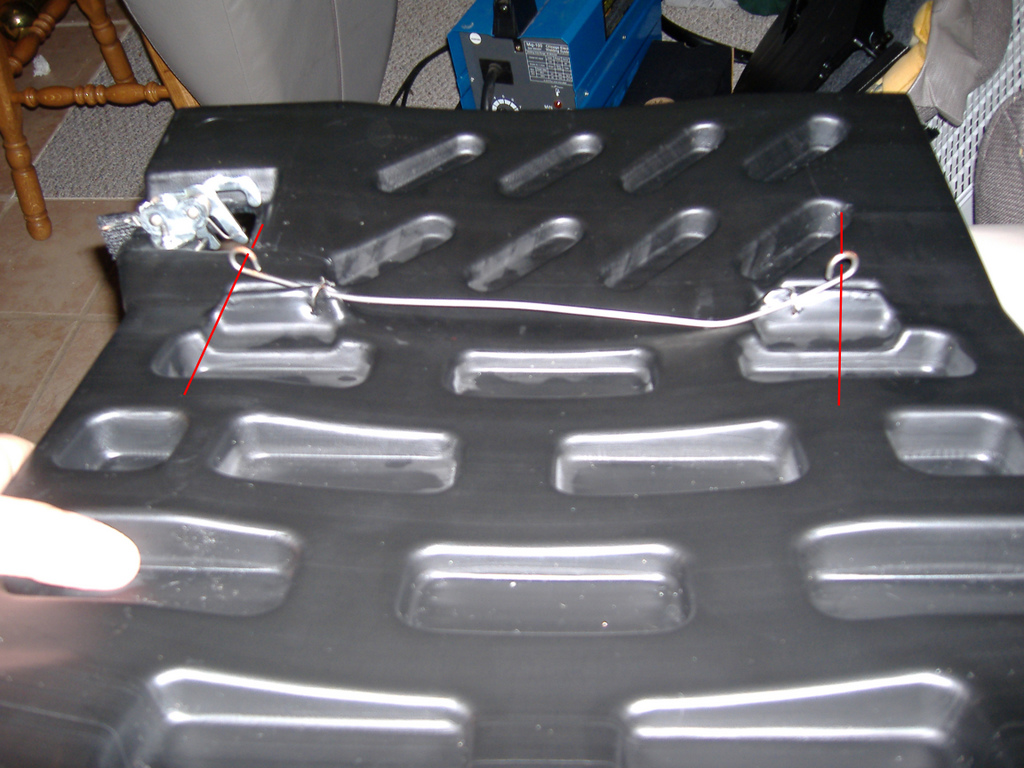
On one set of my seats, I was able to pull the core out at this point. However, on the other set, there was a locking thingy waaayyyy down inside.
Reach way back there and pull the loops off the ends of the rods (up in this picture). Not sure why this part is there…except to completely enrage me until I figured it out. This was obviously much easier on the 60 part than the 40 part.
Step 10
Slide the core from your old seat into the back of the new seat.
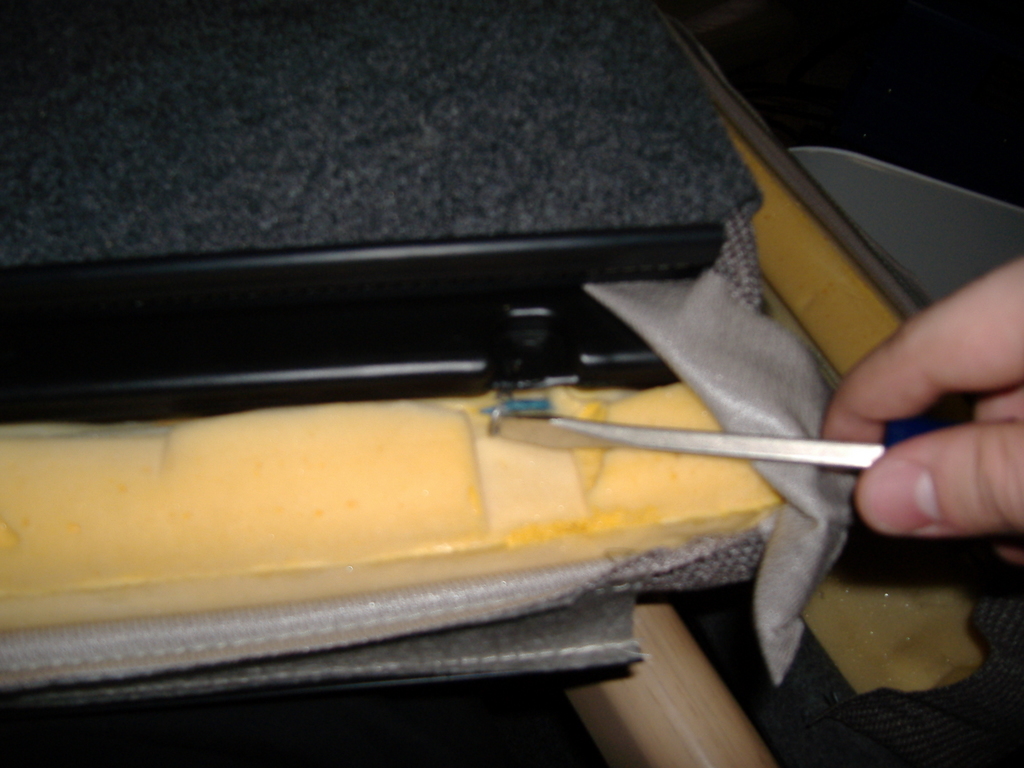
Step 11
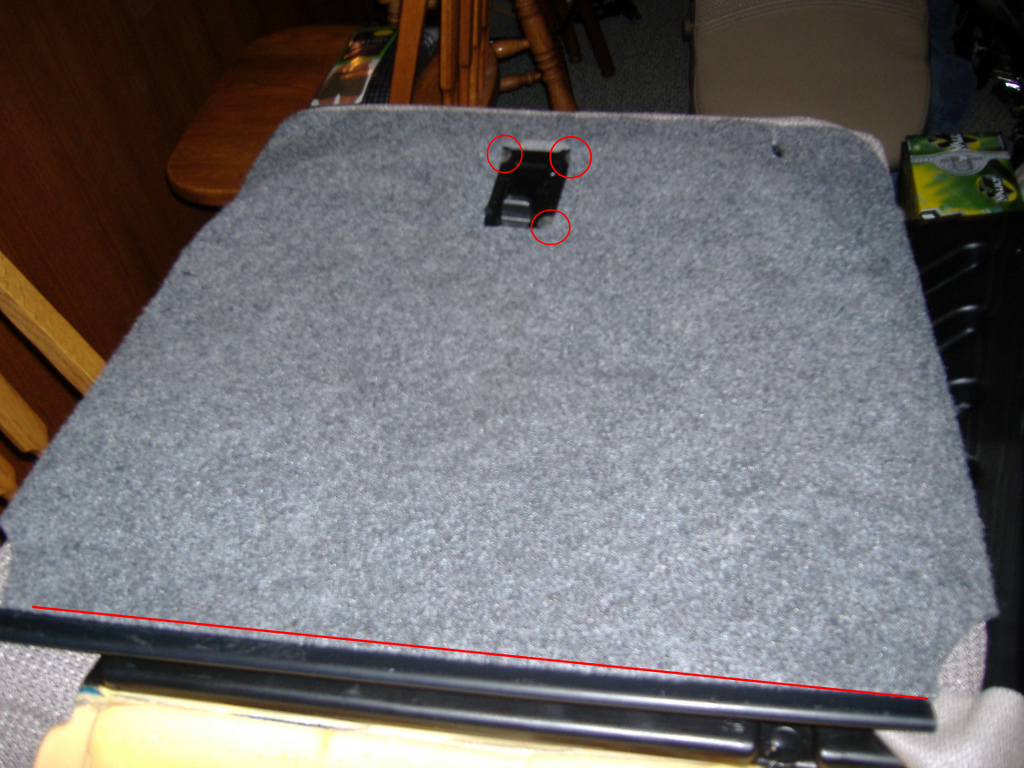
Make a cut here
so that it latches. The easiest way I found to do this was with a razor blade. Don’t cut your seats!
Step 12
At this point, I just snapped the J clips back together and reinstalled the bushing and the seat held together just fine. If you want to go back and reconnect all those obnoxious clips, go right ahead.
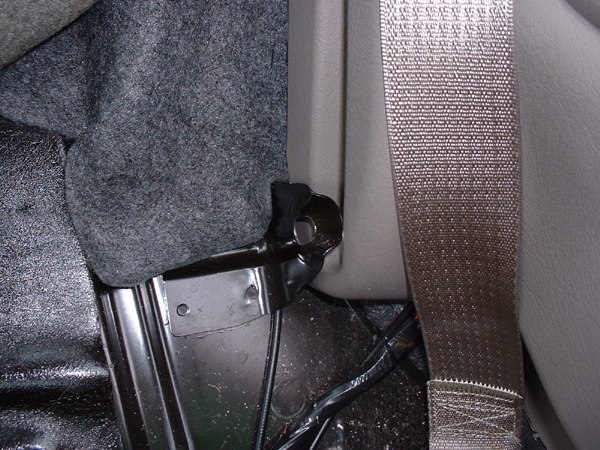
Using the old hole and reaching through the hole in the side of the seat, run the strap for the seat release back to it’s original location. You may wish to extend this, as it has become shorter after we moved them farther in.
Step 13
Reinstall the backs.
Success!
I’d be happy to answer any questions just PM me on sixthsphere.com!
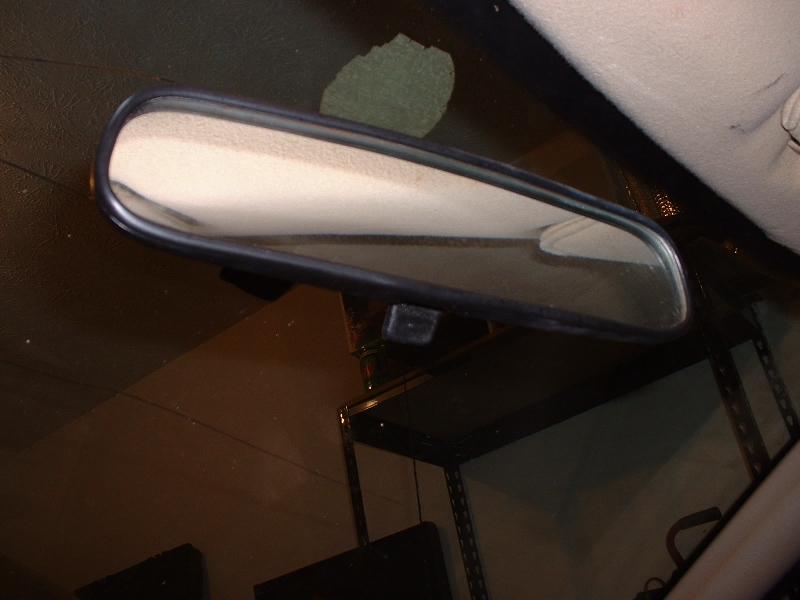
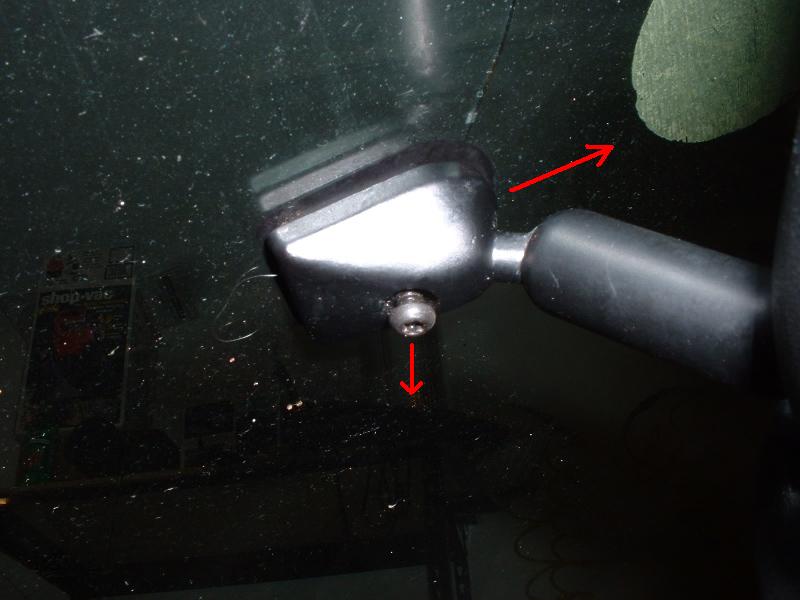
This is a very easy job – the mirror is held on with a set screw. Using a T10 (torx) screwdriver, loosen the set screw, and the mirror will slide right off the metal plate that is glued to the windshield.
Installation
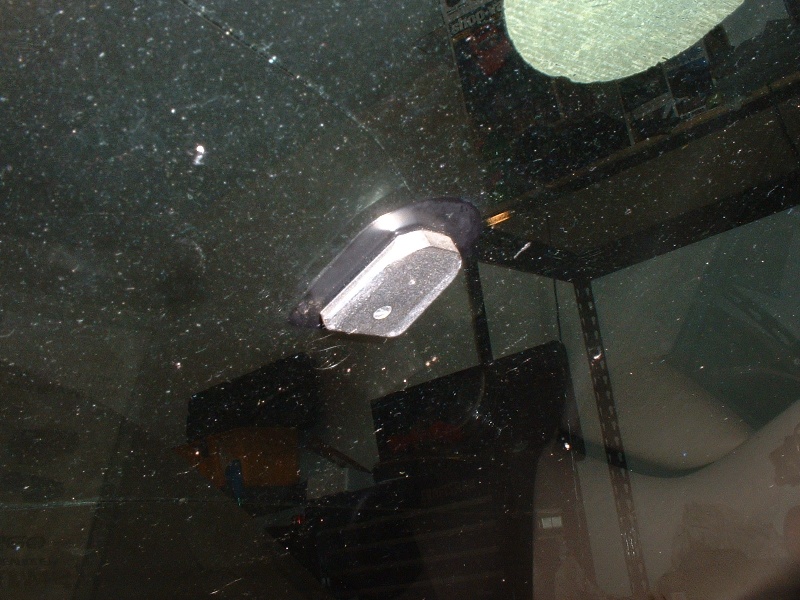
Just slide the base of the mirror onto the metal plate glued to the windshield, and tighten the set screw with a T10 (torx) screwdriver. If your metal plate has fallen off the windshield, auto parts stores sell “repair kits” with the glue you’ll need to reattach it.
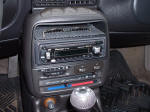
This is a simple solution to an aftermarket stereo faceplate that is loose and vibrates. Just find some very thin foam, and cut it out to fit the back of the faceplate, then smoosh it in between the faceplate and the stereo headunit. Mine required no adhesive. It’s rather tight snapping the faceplate on afterward, but that’s the idea. If you regularly take the faceplate off your headunit, you might want to find some extra-thin foam, or try using less of it than I did.
Unfortunately a lot of the photos for this guide corrupted and have been lost. Hopefully someday I can re-create them or find good copies. Sorry.
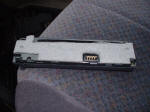
Ok, this is a problem that I had with my car, and I’ve seen the problem on another Saturn, so I figure it’s probably not uncommon. When the trouble with my power window switch first became evident, it was when I couldn’t get the passenger side window up on my ’99 SC1. After dismantling much of the door, my wife suggested that I check the switch. Like any wise man, I considered the advice of my wife and decided to check the switch. It was the problem.
The trouble is that the switch that you actually touch moves a plastic post with a spring, which moves a see-saw like metal piece, which sometimes does not make good contact like it is supposed to. Over time this can build up charring on the contacts, and eventually make the switch work intermittently or not at all. Also, as in my case, heat can build up and melt part of your switch. Pictures of this problem to come…
*Note that first and third gen switches are similar, but not exactly the same. You can likely apply lessons learned here to figure out repairs for the other generations.
Relevant Models
All 1995 – 1999 S-Series with power windows
Tools
Ratchet 7mm socket
Parts
If anyone needs parts for inside the switch, like I did, note that you don’t have to find a switch to match your car. My part came from an SL. The SL’s have the same parts inside the switch as the SC’s – there are just more of the 2-peg posts. You can rob parts from an SL switch to put in an SC switch, and vise-versa. It just needs to be from the same style interior.
Now your switch assembly is removed and you can take it wherever is easiest to work on it. Someplace where you won’t lose small parts is recommended.
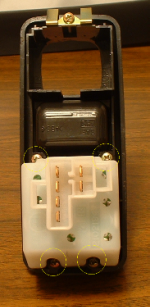
This is what the switch should look like, approximately, on an SC. The SL/SW switch is similar in design, and the interior parts are extremely similar – there’s just more of them, plus a lockout switch.
Step 3
At this point you need to remove the power window switch from the rest of the overall switch panel. Just use a Phillips screwdriver and take out these 4 screws.
Step 4
The switch should now come right out from the switch panel, and will look like this. (On a side note, this is a good time to clean up your switches and get the stuff that the last owner dropped into them.) Now you are ready to take the top, with the finger switches, off of the rest of the switch assembly. To do so, use your Phillips again on these 3 screws:
Step 5
Now the finger switches and the plate they mount to will lift up off the rest of the switch assembly. There are some pieces in here that are not held down, so be sure to keep track of them. They are often somewhat held in place by small amounts of jelly, but they may still fall out. This is what the switch will now look like without the finger switches, and with the two loose pieces removed. You can see the small amount of charring that had built in the 2 weeks or so between when I cleaned the contacts and when I fixed the melted piece (discussed later):
These are the toggle switches. (Note that the express down window does not have these toggles, but a slider. I have not gotten further into the switch to look at how the express window switch is designed.) You may very well see black charring around both ends of these toggle switches. This appears to be a self-perpetuating problem – once the switch chars a little, it is even harder to make contact, and it chars some more.
This may be as far as you will need to dismantle your switch. Use some electrical contact cleaner and clean that puppy right up! If you have had trouble with your power window not working from time to time, this *may* solve the problem.
I do encourage everyone to read further, however, because the occurrence of charring may have caused another problem, which happened to me. Heat may have caused some damage, which I will show in a few pictures.
Step 6
Next we will take apart the finger switch assembly. There is a small metal pin running through each of the finger switches. Look at each end of this pin. One end has a head, the other doesn’t. Push in on the end without the head, then grab the head end and pull the pin out.
Step 7
At this point, the parts should practically fall apart. In a 2-window switch, there will be 6 parts – the 2 finger switches, a white post from each finger switch, the switch base, and the pin.
Notice that the white posts are different. The one for the express window has a single peg sticking down. Posts for regular windows have 2 smaller pegs sticking down. The pegs on the regular window white posts push on those metal rocker switches.
This was where my ultimate problem was. The heat that was created along with the charring had melted one of the pegs on my passenger window post piece. This meant it could not push the rocker switch all the way to make good contact, and the poor contact caused the problem with the charring all over again.
Below is a pic of the post with the melting (on the left), and the post I got from a junkyard to fix the switch with (on the right).
You’ll want to examine your posts and see if any melting like this has occurred. If not, great, just clean up the switch with contact cleaner.
Installation
Assembly is the reverse of disassembly. All the parts are keyed so they shouldn’t be able to be put in wrong. Take your time, and it will go together just fine.
One note: when you place the finger switches (on the base) back on the lower switch assembly, make sure the express window switch peg fits in the slide for it on the lower switch assembly. If you don’t get it in there, it will be evident immediately, and you will just have to take the switch apart again and try again.
This guide is for the DOHC engine with aluminum valve cover, found on most (but not all) 1991-1995 SC/SC2/SL2/SW2 models. However, it’s very similar on other models, and even on the SOHC engine.
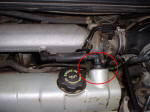
PCV = positive crankcase ventilation. This valve lets air escape from the valvetrain area and into the intake. A clogged/bad PCV contributes to valve cover leakage, so replace it if it does not rattle when you remove & shake it.
Grab the elbow connection to the PCV, and pull outward from the valve cover. It can be a little tight, but should generally be able to be pulled out by hand.
Then remove the foam chunk from behind the trim piece.
Step 2
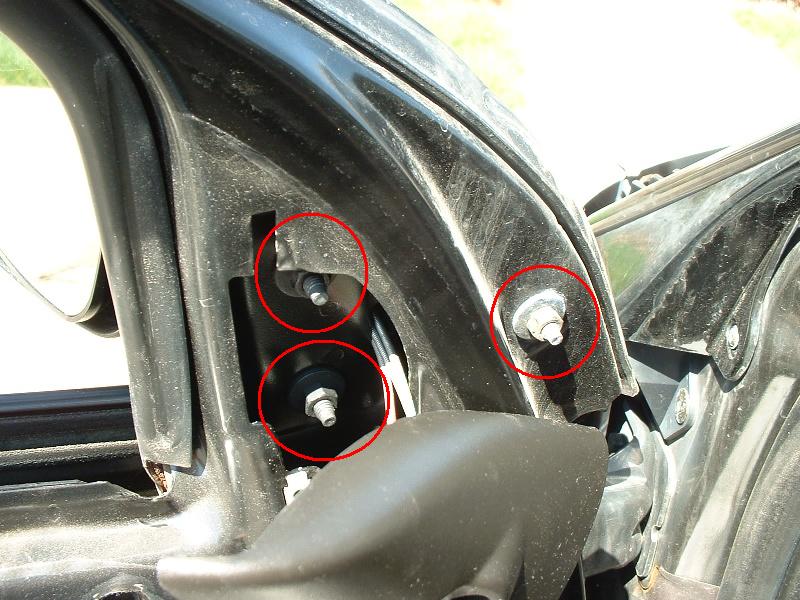
Remove 3 nuts. Using the 10mm deep socket, remove the nuts – normal threading.
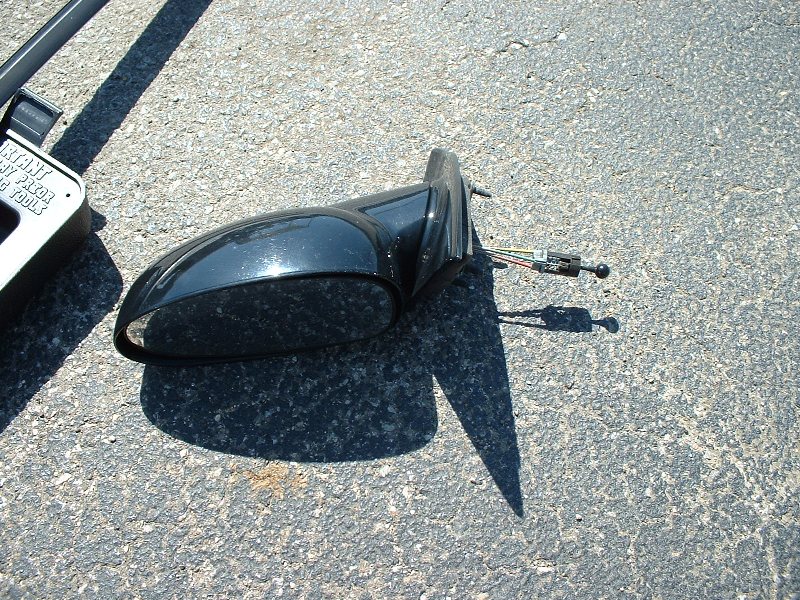
Step 3
Disconnect wiring harness (if applicable). Power mirrors have a simple wiring harness. Use the flathead screwdriver to press the tab & disconnect the harness.
Step 4
Remove mirror. The 3 bolts should slide right out. If the mirror has a manual control or wiring harness, guide it out carefully as well.