

If you’re seeing this post, it’s probably because you’re looking for guides that we don’t have yet. We need authors! If you would like to author some guides for our site, please contact us.
I’ve been asked several times why I haven’t written anymore articles, and the answer is very straight forward. I couldn’t think of anything else. Many people wanted to know about different modifications that could be done to their cars, which parts are better than others, driving techniques, ect ect. All of these are fine subjects to talk and debate about, but in the end I’m not the one to tell you what you should and should not do in these areas. Each autocross driver is as unique as their car and driving style, and one of the fun parts about this sport is figuring out what works for you… not what works for me or the other guy. Agreeably there are things such as tires that will help improve your times, but I’m not about to recommend one brand over another. I’m still trying to figure that much out for myself.
Before I go into this article further, I would just like to congratulate all of you on a great season! The people of the South Bend region make it totally worth dragging my rear end out of bed early on a Sunday. I would also like to take this opportunity to thank once more a few South Bend Region members who graciously allowed me the use of their driver’s seats, while I have spent the season trying to beat the idea into my saturn that plastic can in fact go fast, and not just keep food fresh. Pat Ohmann, and the entire Ohmann tribe… The Buzz bomb is always a blast to drive. I can’t get over how much fun that car is. Stan Jones, that Miata of yours is tangible insanity. I had adrenaline shakes just getting in it. Gary Burton, that mustang of yours did everything I wanted it to do, even when I didn’t know I wanted it to do it at the time. These cars are a true testament to their owners; great cars built by great people. Thank you so much for sharing the experience with me.
On to this issue; putting your car away for the winter. While many of us drive our toys in the winter, due to necessity or desire, many of us also put them away for a winter slumber. This article is for those who store their cars.
There are two ways to store a vehicle. The first is by far the easiest. Simply parking the car and going out to start it once or twice a week. This method works, and I used to do it myself, but there are still a few things to keep in mind.
The biggest drawback to doing it this way, in my opinion, is the fact that you have to go out in the cold and do this stuff. I don’t “do” cold too well. Also, it’s a well known fact that starting your car is rough on the engine, starting it in the cold is even worse. Why punish it more than need be?
Here’s a more involved but better option to storing your vehicle. This option better protects your vehicle, and allows you peace of mind that your investment is well protected.
GAS AND OIL
Change the oil and filter so that no contaminants are left behind. Add fuel stabilizer to your gas prior to filling the tank so that it mixes well. Run the engine long enough so that the stabilized gas makes it through the entire fuel system. Topping up your tank will help to prevent corrosion and adding a stabilizer will make sure your gas remains gas and doesn’t turn into gunk.
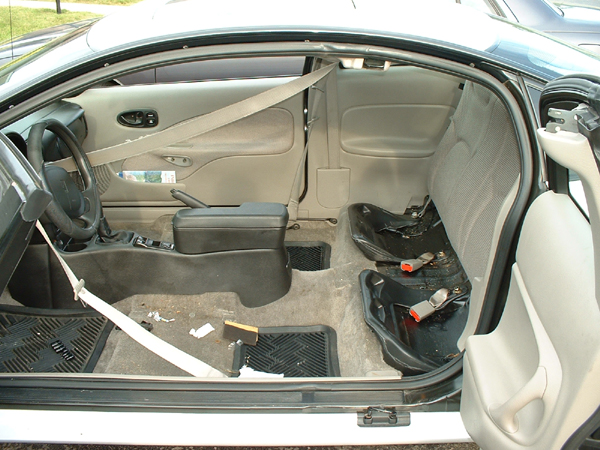
INTERIOR
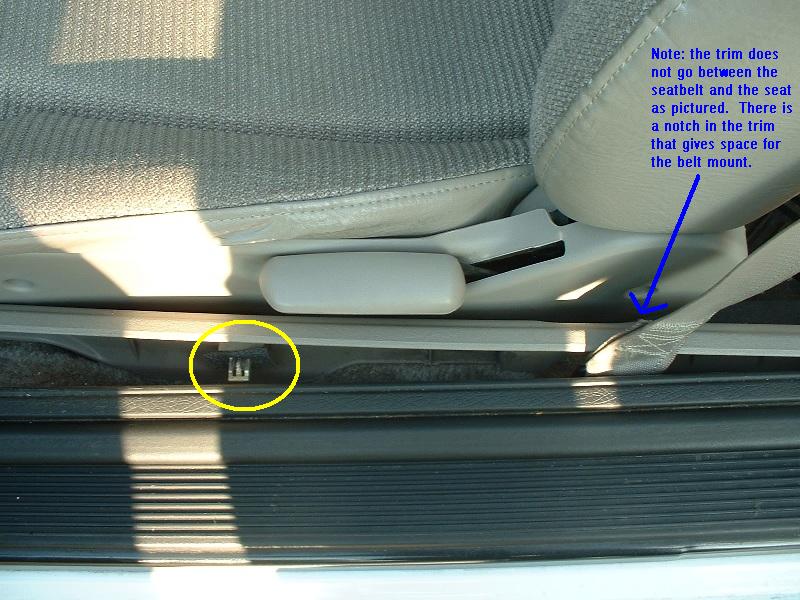
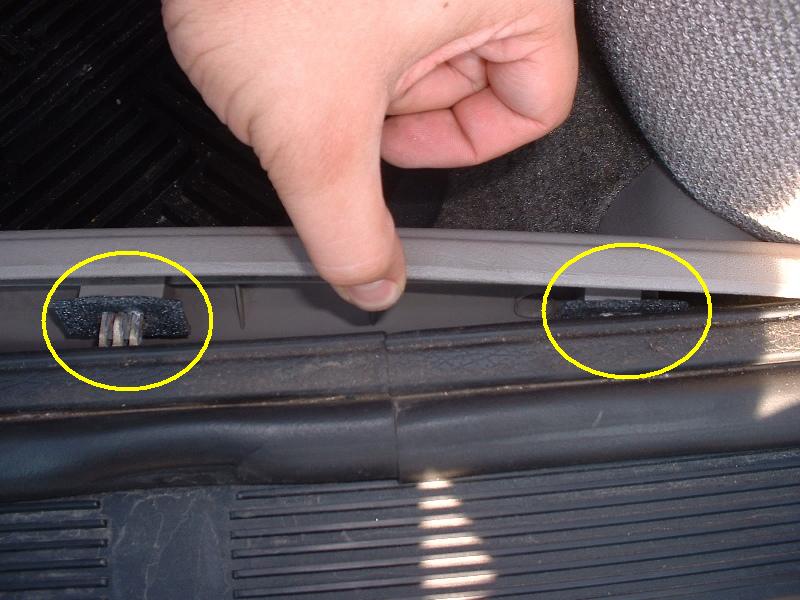
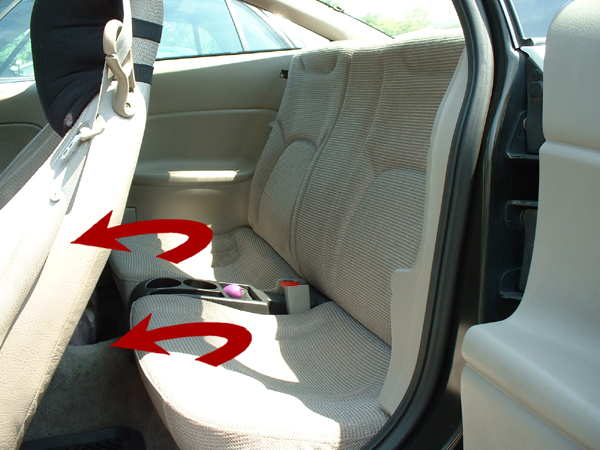
Now is the time to clean the interior thoroughly. Clean the glass, shampoo the carpets, dig in between the seats to see what’s there, clean the upholstery, and get into all the nooks and crannies you’ve wanted to get at all year. Why? Well, there’s no time like the present to get rid of a season’s worth of dirt, and besides, when spring comes along, you want to be able to drive your car, not scrub it.
Make sure everything is spotless and when you’re done, put in some cedar (chips or boards) and silica gel to absorb any excess moisture. I wouldn’t recommend using mothballs since the smell can be hard to get rid of. A good source of silica gel is as close as your nearest department or grocery store. It’s called kitty litter. There are a few companies selling it as the latest and greatest thing for your cat. While it does work great in Fluffy’s litter box, it also works great at absorbing excess moisture in your car.
ENGINE
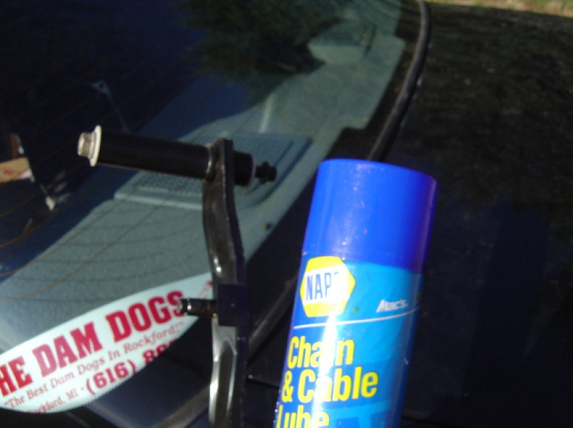
Gas and oil have already been covered, but there’s still work to be done under the hood. Degreasing and cleaning the engine is a good idea so that you can see if there are any leaks that require maintenance. Check all hoses and wires to make sure everything is in good condition and replace any that need to be. The last thing to do is to make sure the internal components of the engine remain lubricated and don’t corrode. There are a number of engine storage products that are designed to keep moisture and corrosion out while your engine is parked for an extended period. Some of these are known as “fogging” sprays, hence the term “fog it and forget it.” I believe this stuff is mainly used for storing marine outboard motors, but it won’t hurt a normal engine.
Another alternative is plain old engine oil. Simply remove the spark plugs and add approximately one (1) ounce of engine oil to each cylinder. The engine should be rotated, BUT NOT STARTED just after adding the oil to the cylinders. The purpose of this step is to coat the cylinder bore to protect against rust formation during storage. Starting the engine will just blow out all of that oil.
Also, one of the biggest problems with long-term automotive storage is rodents, vermin, critters, and varmints. Depending on how secure the facility is that you store your car in, one fact remains…. it’s a source of protection from the elements for both your car and those furry little critters. Most owners don’t realize it, but certain brands of spark plug wires can become a meal for mice. Some brands consist of a silicone inner jacket that surrounds the carbon suppression core. The silicone inner jacket is then surrounded by a vegetable oil based insulating outer shell which mice find particularly appetizing. To help prevent them from making a meal out of your car’s ignition system, place some mothballs in and around the engine compartment, but remember to remove them before starting up the car!
BATTERY
Remove the battery so that you can clean the battery tray and connections to remove any acid or build up that may have accumulated. Your battery should be stored some place relatively warm (not hot) and away from kids, animals, and sources of heat or sparks. I’ve heard that storing a battery on a concrete floor will cause it to go bad quicker. I don’t know if there is merit to this or not, but keeping it on a block of wood couldn’t hurt.
SEAL ANY OPENINGS
Seal up the exhaust tips to prevent any corrosion inside the system, but more importantly, to keep varmints out. Make sure all windows, vents, and any other openings that may exist are closed. You don’t want your vehicle to become a winter home to unwanted pests so seal everything up and periodically check under, in, and around your car to make sure nothing has found a new winter home. The only thing worse than finding a critter in your car, is finding him after he’s been in there for a few months.
CONVERTIBLES
If your car is a convertible, store it with the top up. A folded top can dry out and crack over the winter. Keeping the top up also provides one less method of entry for unwanted critters. Be sure to clean and condition the top prior to storage to prevent it from drying out.
GETTING OFF THE GROUND
The purpose of blocking up your car is to prevent flat spotting of your tires and to take some of the strain off of the suspension. Whether you put blocks under your car or not is up to you, but if you do, make sure the blocks are under the frame and not the springs. Use something solid and stable, like axle stands, to support your car. This will help to prevent unfortunate accidents while your car is stored and when your getting ready to bring it out again. Finally, don’t forget about your car. Go visit it once in a while, bring it flowers, read it a story….just keep reminding it that it’s special to you.
Well, I think I’ve covered all the bases for this particular article. Once again, if you feel I am in error, omitted something important, or wish to share your mega millions lotto winning with me, my e-mail is always available to you. I thank you for reading, and leave you with a suggested quote by the late Carroll Smith.
“I am fully aware that much of what I have to say in this book is subjective. I wish that my knowledge and wisdom were such that this were not so. Many readers are going to disagree with my interpretations, conclusions and recommendations. I offer no apology. In each case I will put forth my personal best shot on the subject at the time of writing. I reserve my right to change my thinking at any time. ”
Respectfully Submitted,
Adam Lewis
South Bend Region SCCA Chief Tech Inspector
(Note from the author: This article is intended as a helpful guide, and nothing more. Every precaution should be taken concerning safety when performing any of the above tasks. If you are unsure about performing any of the above tasks, it is advised you seek the assistance of a professional. The “Author”, “The South Bend Region SCCA” or the “SCCA” CANNOT be held liable for any person(s) injured while performing these tasks, or be held liable for any damage to any vehicle(s) directly or indirectly resulting from the advice in this article.)